Long before I got into Home Assistant, or even my journey with the Vera controller before it, I had a “smart” irrigation controller. My house came with some Rain Bird controller that had very unintuitive controls and no smart/remote control capabilities. I was at a part of my smarthome journey where I wanted devices I could control remotely. Here is how I went from getting a smart irrigation controller that was controlled by the cloud to having it locally controlled by Home Assistant.
This page contains affiliate links. If you purchase an item using an affiliate link I will receive a small commission at no cost to you. Affiliates do not influence my recommendations. Read my disclosures for more information.
Table of Contents
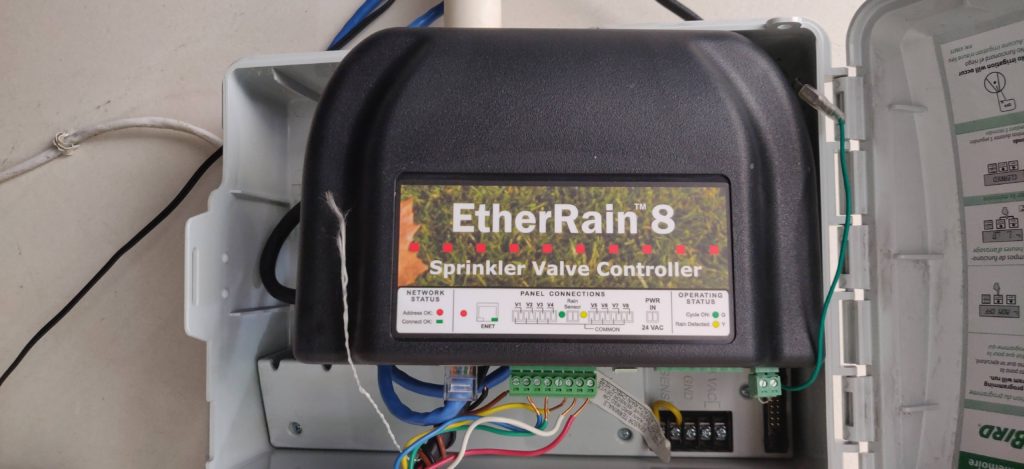
Background on my EtherRain Irrigation Controller
After a little research, I ended up with a relatively inexpensive EtherRain controller. It can be controlled via the cloud service. However, it also has a web API that can be controlled locally. Quicksmart, the company behind EtherRain, provides programs that you can run locally to control the EtherRain. They even have a PHP-based version that runs fine on Linux. However, at the time I tried it, it didn’t have all the functionality of the cloud-based service.
For years I’ve been running my irrigation controller using the Lawncheck service and for the most part, it has worked. However, I like to have local control if at all possible. Integration with Home Assistant is even better.
Deciphering the irrigation controller REST API
My first task was to figure out the local API of the EtherRain controller. I spent some time looking through the PHP code for the local program they provide. Then, I had a better idea. I asked their support if they had some documentation and they quickly sent me their EtherRain API document. That made it pretty easy. Basically, you send a rest command to log in, then you can execute commands. There is also a status command that will give you the status of all the controllers and all of your irrigation zones (I have 4 zones). Unfortunately, all replies from commands are sent in HTML format. I wish the information was returned in a JSON format.
Create Home Assistant control REST commands
Armed with the commands I need I started off by creating some REST commands in Home Assistant that correspond to the API calls. First I added the following to my configuration.yaml:
rest_command: !include rest.yaml
This allows me to put my rest commands in the file rest.yaml. Then I added the following commands to rest.yaml
etherrain_login:
  url: http://etherrainIP/ergetcfg.cgi?lu=USERNAME&lp=PASSWORD
stop_irrigation:
  url: http://etherrainIP/result.cgi?xr
side_back_landscape:
  url: http://etherrainIP/result.cgi?xi=1:20:0:0:0:0:0:0:0
side_yard:
  url: http://etherrainIP/result.cgi?xi=1:0:20:0:0:0:0:0:0
back_yard:
  url: http://etherrainIP/result.cgi?xi=1:0:0:20:0:0:0:0:0
front_yard_landscape:
  url: http://etherrainIP/result.cgi?xi=1:0:0:0:20:0:0:0:0
Let’s step through each of these commands:
- etherrain_login – This is the command that has to be called before other commands to authenticate. Obviously, you’d have to plug in the appropriate IP, username, and password for your EtherRain controller.
- stop_irrigation – This is the command to stop any irrigation that is currently in progress (no matter the zone).
- side_back_landscape, side_yard, back_yard, front_yard_landscape: These are my 4 zones. The format of the command to irrigate starts with xi=. The next parameter is how long to wait before starting irrigation (I’ve set this to 1 minute). Then you put the number of minutes each zone should irrigate for, separated by colons (this is an 8-zone controller). For instance, if I just want to start Zone 2 (my side_yard sprinklers) then I put 1:0:20:0:0:0:0:0:0. This means in 1-minute run zone zones 0 and 3-8 for 0 minutes (don’t run them), and zone 2 for 20 minutes. As you can see, I set up an individual irrigation command for each zone.
Controlling individual zones from Home Assistant
After creating the REST commands I still needed scripts to actually execute the turning each zone on and off. These scripts are pretty simple. Here’s the script for turning the back_yard sprinklers:
start_back_yard_irrigation:
  alias: Start Back Yard Irrigation
  sequence:
  - service: rest_command.etherrain_login
  - service: rest_command.stop_irrigation
  - service: rest_command.back_yard
I send the login command to authenticate, then I make sure any current irrigation is automatically stopped, and then I send the rest command to start irrigating the backyard. The commands for the other parts of the yard are similar. I just replace the last service call with the appropriate rest_command.
Keeping track of the status
I should add, that before I brought this control completely into Home Assistant, I wrote a shell command that sends that status command to the controller. It then parses the HTML output to determine what zone is currently running, whether or not the last command I sent was successful, and a few other statuses. This is useful for debugging. I eventually created some MQTT sensors that track how long each zone has been on and the status of the controller via this shell script. It’s mostly used for testing, so I haven’t included the details here. Let me know if you are interested.
Using Home Assistant to implement my irrigation schedule
It’s great that I can now turn individual zones off and on via Home Assistant. What I really want to do, however, is create a schedule and automate my sprinklers. I run my sprinklers from May through September. My schedules in May and September are much lighter (less frequent) than the schedules over the summer months. Also, if the forecast indicates it’s going to rain today or tomorrow, my sprinklers don’t run their regularly scheduled irrigation. I need to duplicate all of this functionality in Home Assistant to leave Lawncheck behind.
Get rain forecast from the National Weather Service
The first step is to get the weather information that includes a rain forecast. Dark Sky made this pretty easy, but right as I was implementing this Apple announced the Dark Sky API would be coming to an end in 2021. I hate it when companies do that. Luckily there are alternatives. None of the services that included specific rain forecasts seemed as straightforward to use, so I was preparing to do some research. However, just as I began this research, JS Automation posted an awesome step-by-step tutorial for using the NWS Home Assistant weather service integration to get exactly the data I want. I followed his instructions step by step to create many sensors including:
- sensor.nws_current_rain_forecast – this sensor stores the current percent chance of rain
- sensor.nws_forecast_rain_tomorrow – this sensor stores tomorrow’s percent chance of rain
- sensor.nws_forecast_rain_tomorrow_night – this sensor stores tomorrow night’s percent chance of rain
I will use all three of these sensors as conditions in my irrigation scheduling later in this article.
Create REST commands and scripts for the irrigation schedule
So far, I’ve only created REST commands that activate one zone at a time. When I’m scheduling irrigations I always water more than one zone. I actually only really have 3 different programs for my irrigation. I just run them more or less frequently depending on the month. The 3 corresponding shell commands to my schedules are:
full_irrigation:
  url: http://192.168.1.36/result.cgi?xi=60:15:25:30:15:0:0:0:0
grass_irrigation:
  url: http://192.168.1.36/result.cgi?xi=60:0:30:45:0:0:0:0:0
landscape_irrigation:
  url: http://192.168.1.36/result.cgi?xi=60:25:0:0:18:0:0:0:0
Full irrigation means watering every zone in my yard. Grass irrigation means only watering the grass, and landscape irrigation means watering the zones with landscaping and flower beds. One key thing to note is that these commands schedule the irrigation 60 minutes after they are called. I do this just to schedule in advance. This gives me time to adjust or cancel the irrigation if I want to for some reason.
Now, I need to use these rest commands in scripts like the ones for individual zones for them to actually work. Here’s an example:
start_full_irrigation:
  alias: Start Full Yard Irrigation
  sequence:
  - service: rest_command.etherrain_login
  - service: rest_command.stop_irrigation
  - service: rest_command.full_irrigation
Once again, I just swap out the last service command for the command representing the zones I want to be watered.
Write irrigation scheduler automation
Now, onto the scheduling. For this, I’ll use an automation that is written in a way that is easy to read. But before I get to the automation, I decided I also want to track the last time my irrigation control ran. To do this I’ll use an MQTT sensor (if you haven’t set up MQTT with Home Assistant, here’s a guide):
  - platform: mqtt
    name: "EtherRain Last Run Time"
    state_topic: "etherrain/status/LastRunTime"
    qos: 2
And I’ll modify all of my irrigation scripts to publish the current time to this sensor. For example:
start_full_irrigation:
  alias: Start Full Yard Irrigation
  sequence:
  - service: rest_command.etherrain_login
  - service: rest_command.stop_irrigation
  - service: rest_command.full_irrigation
  - service: mqtt.publish
    data:
      topic: etherrain/status/LastRunTime
      payload_template: '{{ as_timestamp(now()) | timestamp_custom("%b %d @ %I:%M %p")}}'
      retain: true
      qos: 2
Now here’s my automation for scheduling my irrigation:
- id: schedule_irrigation
  alias: Schedule Irrigation
  initial_state: 'true'
  trigger:
  - platform: time
    at: 03:00:00
  condition:
    - condition: numeric_state
      entity_id: sensor.nws_current_rain_forecast
      below: '50'
    - condition: numeric_state
      entity_id: sensor.nws_forecast_rain_tomorrow
      below: '50'
    - condition: numeric_state
      entity_id: sensor.nws_forecast_rain_tomorrow_night
      below: '50'
  action:
    - service_template: >
        {% set weekday_full_name = now().strftime("%A") %}
        {% set month_full_name = now().strftime("%B") %}
        {% if month_full_name == "May" or month_full_name == "September" %}
          {% if weekday_full_name == "Monday" or weekday_full_name == "Friday" %}
           script.start_full_irrigation
          {% else %}
           rest_command.do_nothing
          {% endif %}
        {% elif month_full_name == "June" or month_full_name == "July" or month_full_name == "August" %}
          {% if weekday_full_name == "Monday" or weekday_full_name == "Thursday" or weekday_full_name == "Saturday" %}
           script.start_landscape_irrigation
          {% elif weekday_full_name == "Tuesday" or weekday_full_name == "Friday" %}
           script.start_grass_irrigation
          {% else %}
           script.do_nothing
          {% endif %}
        {% else %}
         script.do_nothing
        {% endif %}
Let’s dissect this code:
- The trigger is 3:00 AM every day. I like to water my lawn early in the morning, and since my irrigation commands start 60 minutes after they are called, my irrigation starts at 4.
- I use the three rain forecast sensors I created earlier as conditions. If there is a more than 50% chance of rain today, tomorrow, or tomorrow night it’s time to conserve water and let nature do its job. I may adjust this parameter at some point, but 50% seems good.
- For the scheduling, I decided to make this code relatively easy to read. I created variables that have the day of the week and the month of the year. That makes the if statements below easier to read. Basically, I run full irrigation on Mondays and Fridays in May and September. From June-Aug, it’s a slightly more complicated and more split schedule, but hopefully easy to read.
Because I’m using a service template, I should always return some command or there will be a YAML error in my logs (probably not a big deal). So when there is no irrigation to do, I just call a command that does nothing. Now I have my irrigation scheduled!
Keep track of when the next irrigation is scheduled
Ahh, but just scheduling wasn’t good enough for me. I also want Home Assistant to know and show me when the next irrigation is scheduled. First, I created a sensor similar to the last run MQTT sensor.
  - platform: mqtt
    name: "EtherRain Next Run Time"
    state_topic: "etherrain/status/NextRunTime"
    qos: 2
I thought about modifying my scheduling automation to also publish the next run of irrigation. The flaw in that, however, is that the automation won’t run every day due to the rain forecast conditions. So I created a script specifically for publishing the next scheduled irrigation:
set_next_irrigation_run:
  alias: Set Next Irrigation Run
  sequence:
  - service: mqtt.publish
    data:
      topic: etherrain/status/NextRunTime
      payload_template: >-
       {% set weekday_full_name = now().strftime("%A") %}
       {% set month_full_name = now().strftime("%B") %}
       {% if month_full_name == "May" or month_full_name == "September"%}
         {% if weekday_full_name == "Friday"%}
           {{ (as_timestamp(now()) + (3*24*3600)) | timestamp_custom('%b %d')}} @ 04:00 AM
         {% elif weekday_full_name == "Saturday"%}
           {{ (as_timestamp(now()) + (2*24*3600)) | timestamp_custom('%b %d')}} @ 04:00 AM
         {% elif weekday_full_name == "Sunday"%}
           {{ (as_timestamp(now()) + (24*3600)) | timestamp_custom('%b %d')}} @ 04:00 AM
         {% elif weekday_full_name == "Monday"%}
           {{ (as_timestamp(now()) + (4*24*3600)) | timestamp_custom('%b %d')}} @ 04:00 AM
         {% elif weekday_full_name == "Tuesday"%}
           {{ (as_timestamp(now()) + (3*24*3600)) | timestamp_custom('%b %d')}} @ 04:00 AM
         {% elif weekday_full_name == "Wednesday"%}
           {{ (as_timestamp(now()) + (2*24*3600)) | timestamp_custom('%b %d')}} @ 04:00 AM
         {% elif weekday_full_name == "Thursday"%}
           {{ (as_timestamp(now()) + (24*3600)) | timestamp_custom('%b %d')}} @ 04:00 AM
         {% else %}
           WEEKDAY ERROR MAY/SEPT
         {% endif %}
       {% elif month_full_name == "June" or month_full_name == "July" or month_full_name == "August" %}
         {% if weekday_full_name == "Friday"%}
           {{ (as_timestamp(now()) + (24*3600)) | timestamp_custom('%b %d')}} @ 04:00 AM
         {% elif weekday_full_name == "Saturday"%}
           {{ (as_timestamp(now()) + (2*24*3600)) | timestamp_custom('%b %d')}} @ 04:00 AM
         {% elif weekday_full_name == "Sunday"%}
           {{ (as_timestamp(now()) + (24*3600)) | timestamp_custom('%b %d')}} @ 04:00 AM
         {% elif weekday_full_name == "Monday"%}
           {{ (as_timestamp(now()) + (24*3600)) | timestamp_custom('%b %d')}} @ 04:00 AM
         {% elif weekday_full_name == "Tuesday"%}
           {{ (as_timestamp(now()) + (2*24*3600)) | timestamp_custom('%b %d')}} @ 04:00 AM
         {% elif weekday_full_name == "Wednesday"%}
           {{ (as_timestamp(now()) + (24*3600)) | timestamp_custom('%b %d')}} @ 04:00 AM
         {% elif weekday_full_name == "Thursday"%}
           {{ (as_timestamp(now()) + (24*3600)) | timestamp_custom('%b %d')}} @ 04:00 AM
         {% else %}
           WEEKDAY ERROR JUNE/JULY/AUGUST
         {% endif %}
       {% else %}
         No irrigation scheduled until May 1st
       {% endif %}
      retain: True
      qos: 2
The only downside to this automation is that I have to change it if/when I ever change my actual scheduling, but it’s pretty easy to change.
I then created a simple automation that runs this script every day.
- id: set_next_irrigation_run
  alias: Set Next Irrigation Run
  initial_state: 'true'
  trigger:
  - platform: time
    at: 04:15:00
  action:
  - service: script.set_next_irrigation_run
Home Assistant User Interface
The final result is in this Home Assistant user interface:
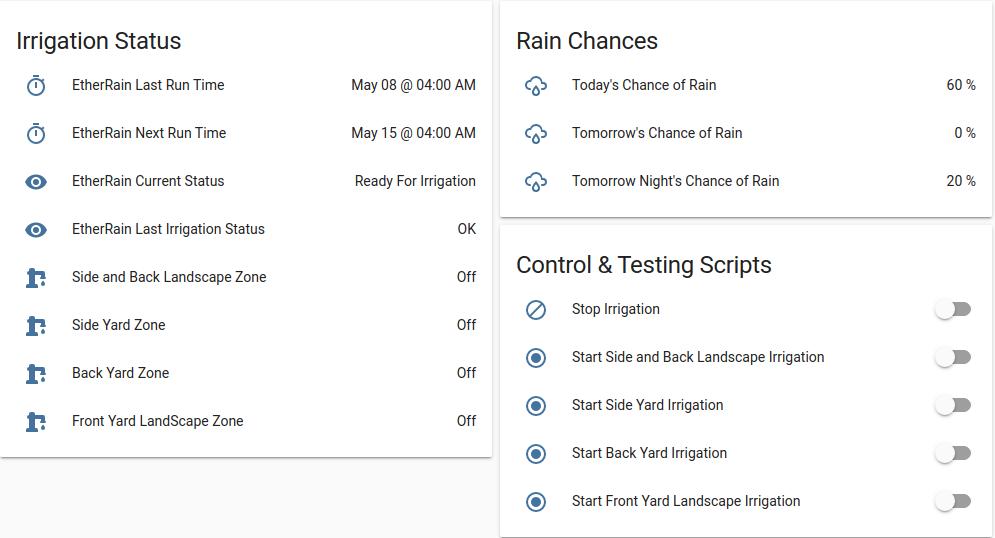
This allows me to run individual zones, see when the last time irrigation was run, and know when it is next scheduled to run. It also has some status sensors I built for testing purposes that I did not detail in this article.
Final thoughts
I’ve been running this for a while and it works. I also have created a way to control these using an RF remote and a Sonoff RF Bridge. This makes it easier for anyone servicing my sprinklers to turn them on because I don’t have to give them access to Home Assistant. Although I use cloud weather data, it’s nice to know that if Lawncheck discontinues its service I can run this without it. And this logic would work with a regular relay, not just the EtherRain, should I ever wish to replace it.
Do you have smart irrigation control? Is it integrated with Home Assistant? Tell me more in the comments or on Twitter.