Upgrading your router is an important step in keeping your home network secure. If you are interested in your home security, you should really consider pfSense for your router for these reasons. However, even pfSense needs upgrades from time to time. Upgrading pfSense isn’t hard. Following the advice in this article will give you the best chance of success when you upgrade pfSense.
Table of Contents
Read the release notes for the pfSense upgrade
When you are upgrading anything important, it is always a good idea to read the release notes. Sometimes key features are removed or added and you want don’t want to be surprised. The release notes for pfSense are usually concise so it’s worth the few minutes to take a look before upgrading.
Consider waiting and checking pfSense forums
Some upgrades are more problematic than others. You can usually start to get a read on how well pfSense upgrades are working for people in the pfSense forums. Just keep in mind, more people post when things go wrong than when things go right, so the comments will be slanted. See if you can find upgrade results for people with your hardware. Their experience is likely to be your experience.
Create an upgrade fallback plan
Before you upgrade pfSense you should make sure you have a fallback plan in case things go wrong. Usually, this involves being prepared to restore your previous installation with an older pfSense image and a backup configuration. Speaking of backups…
Backup pfSense

Taking regular backups is a good thing for all of your key data and configurations in your home. It is absolutely critical for your router configuration. Take a backup of your pfSense configuration right before you upgrade. It’s a pretty easy process that I detailed in my pfSense tips and tricks article.
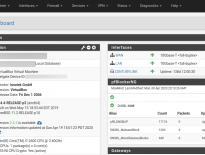
If like me, you run pfSense in a virtual machine, you can also take a snapshot. This makes restoring your previous pfSense state trivial in the rare case something goes wrong.
Reboot your pfSense machine
This step is optional but recommended by the pfSense developers. Reboot your machine right before you start the upgrade. Rebooting can help you identify potential pre-upgrade issues that might need addressing and it gives you the best chance of good results.
Remove all pfSense packages
For me personally, this is the hardest step to follow. It sounds scary, but your configurations will be saved. Most pfSense upgrade problems result from package upgrade errors. If you remove the packages, upgrade, and then reinstall them you have a higher chance of upgrade success. Make sure you document the packages you want to reinstall before removing them.
As a side note, never upgrade packages after a new release is available. Those packages are usually made to be compatible with the latest release and upgrading them can break the package or your entire install if you aren’t on the latest version.
Upgrade pfSense at the right time

Once you’ve done all these things you are ready to hit the upgrade button. Just make sure you’ve picked a time to upgrade that is okay with the people on your network, and that you have the time to monitor and possibly (but probably not) troubleshoot. Most of my upgrades have taken 20 minutes or less, but I usually allot an hour just to be safe.
Final thoughts
Now you are prepared to successfully upgrade your pfSense installation. Are their other steps you take before upgrading pfSense? Let us know in the comments or on Twitter.
Also, if you are looking for other information about pfSense be sure to check out the following articles:
- 6 Reasons to Use a pfSense Home Router
- 5 Great Choices for pfSense Hardware
- Planning Your pfSense Router Install and Configuration
- 6 pfSense Configurations to do After Install
- How and Why I Built a Virtual Router