
Mail theft is a growing problem in many neighborhoods, including mine. I have a locking box and thieves have still broken into my mailbox. I’ve long wanted to use a mailbox sensor to alert me to when my mail is delivered, but my mailbox is 200 feet away from the house. Zigbee, Z-Wave, and Wi-Fi mailbox sensors won’t work from that far away. Enter the Ring Mailbox Sensor. It’s advertised as working over long distances. Does it work well and is it worth buying? Read on to see how it worked for me and if it might work for you.
This page contains affiliate links. If you purchase an item using an affiliate link I will receive a small commission at no cost to you. Affiliates do not influence my recommendations. Read my disclosures for more information.
Table of Contents
What I was looking for in a mailbox sensor
First and foremost, I wanted a mailbox sensor that would work over long ranges. I wish I had a mailbox right outside my house, but my mailbox is up a long driveway hill and across the street. Second, and equally important, I wanted a sensor that could integrate with Home Assistant, my smart home hub of choice. It’s not good enough for me to just have notifications of when the mail arrives in some app. I want to be able to make automations from it, like having a message played in my house that the mail has arrived, or turning a lamp a certain color when the mail has arrived. This is easy to do with Home Assistant. Lastly, I didn’t want to break the bank with this sensor!
Ring Mailbox Sensor alternatives I considered
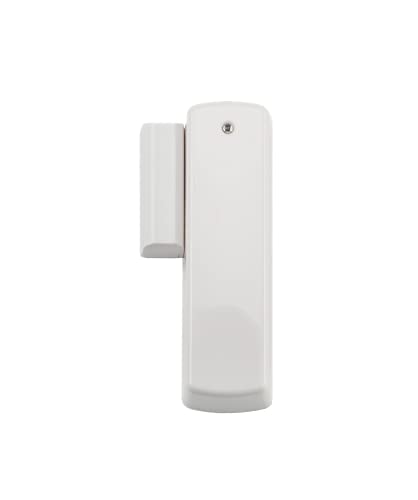
First I thought about the standard Z-Wave and Zigbee door/window sensors like:
| Preview | Product | Price | |
|---|---|---|---|
|
Ecolink Z-Wave Plus Door Window Contact Sensor (DWZWAVE2.5-ECO) |
$31.89 |
Buy on Amazon |
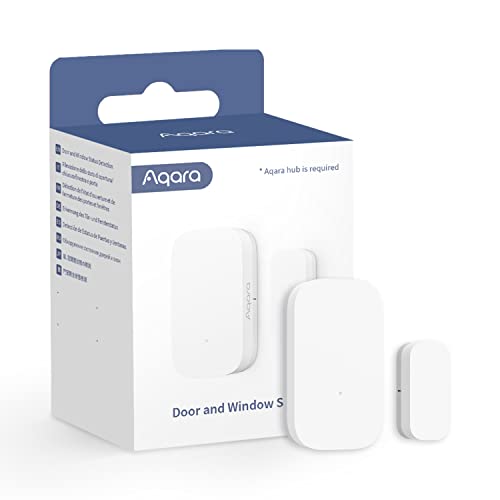
|
Aqara Door and Window Sensor, Requires Aqara Hub, Not Support Hubs from Other Brands, Zigbee... |
$24.99
$17.99 |
Buy on Amazon |
Although they would be easy integrate with my smart home controller because it supports Zigbee and Z-wave, I couldn’t find any reliable way of extending my Z-wave or Zigbee range that far.
Next, I looked products specifically made for mailbox detection at long ranges like:
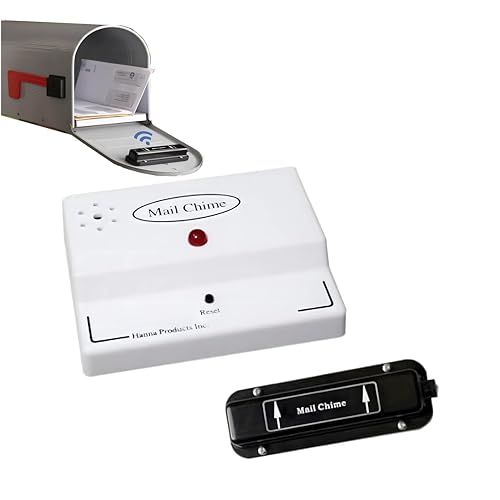
On the surface, these looked like good solutions, and they may work for many of you. My primary issue with these solutions is the lack of integration with Home Assistant. There may be a way to kludge together something, but I couldn’t think of anything that would be easy.
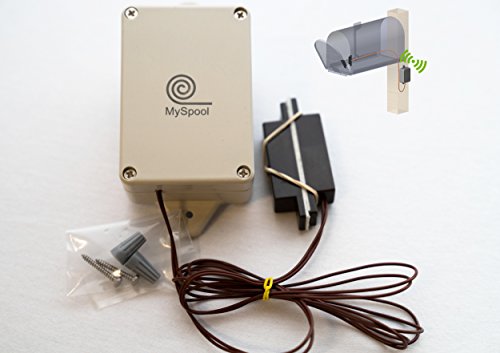
Other options some may consider are using motion cameras and homemade wireless sensors. Motion cameras would be too hard to tune for me because of the distance and the fact the mailbox is across the street. I almost started down the DIY route, but then something fortuitous happened. While chatting with Richard Gunther on the Home: On podcast, Richard mentioned how well the Ring Mailbox Sensor worked for him and that his mailbox is also far away from his house. That’s when I knew I was going to give this mailbox sensor a try.
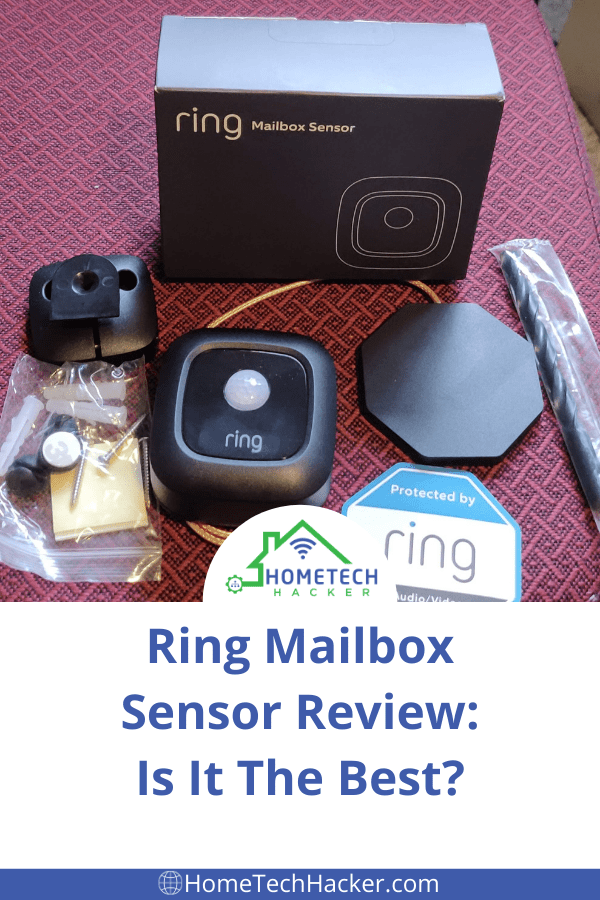
Ring Mailbox Sensor overview
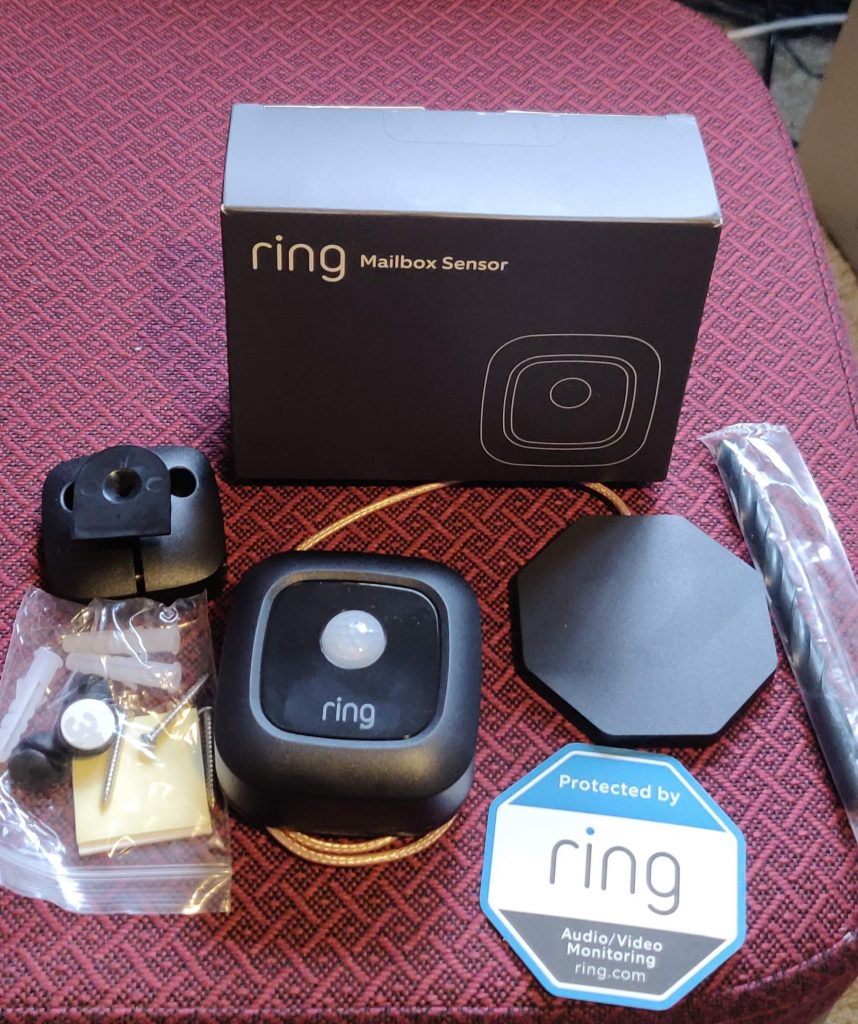
The Ring Mailbox Sensor is actually just Ring’s motion detector, powered by three AAA batteries, with a long-range antenna for communicating with the Ring Bridge. It simply senses motion to determine if the mailbox has been opened or not. Included with the motion sensor and antenna are mounting hardware, adhesive tape, and a drill bit. If you don’t already have a Ring Bridge you’ll need to get one, as this device requires it. Luckily, the Ring Bridge comes at a discount if you buy it with the Ring Mailbox Sensor.
The Ring Bridge relays the mailbox sensor signals to the cloud so you can receive notifications. It is also the same Ring Bridge used by many of Ring’s other products, like their assortment of smart lights and motion sensors. The Ring Bridge only works on 2.4 GHz Wi-Fi networks (802.11 b/g/n).
Installation and configuration
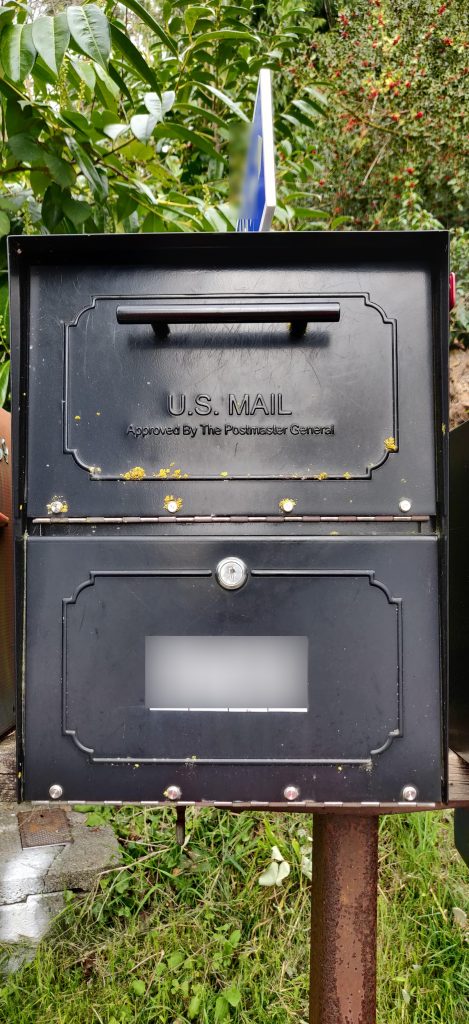
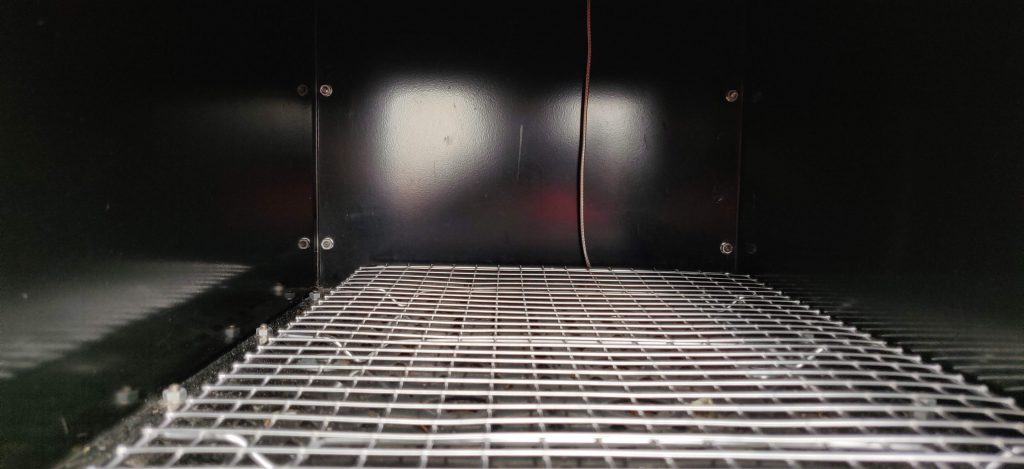
Installing the Ring Mailbox Sensor was simple for me. As you can see above, I have a locking mailbox. The way it opens, the sensor won’t fit on the part the mailman opens because then the mailbox can’t close. There is just a little slit in the top drawer to slide mail in through. I ended up installing the sensor in the back of the mailbox, using the included adhesive. I figured it would probably still detect motion from there.
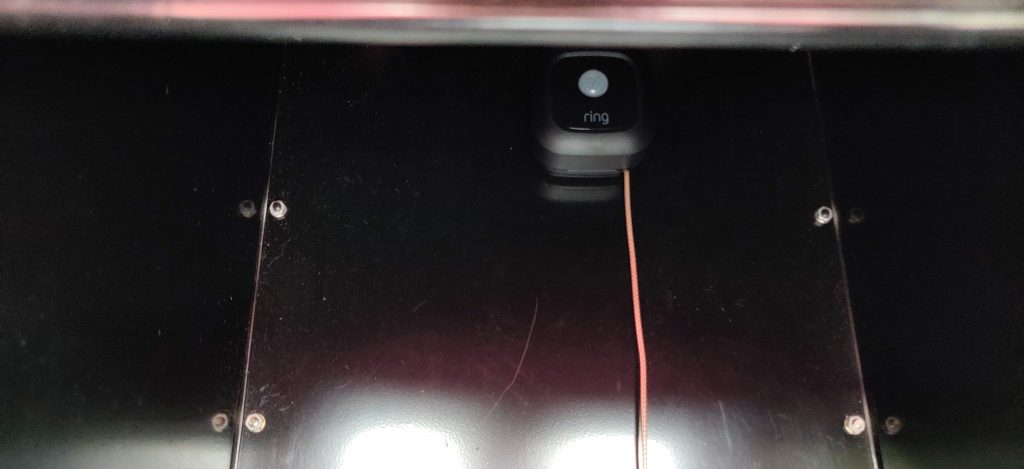
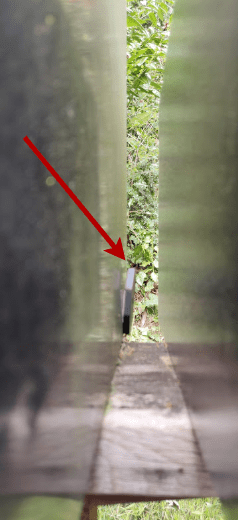
The antenna needs to be installed outside of the mailbox to communicate with the Ring Bridge. Ring was thoughtful enough to include a drill bit to drill a hole to run the wire from the mailbox sensor to the outside of the mailbox. However, I already had holes in the bottom of my mailbox and I just fished the wire through the hole to the outside of the box, where I installed the antenna (see the picture below).
Configuring the mailbox sensor was straightforward. If you haven’t already configured the Ring bridge and created an account, you’ll need to do that first via the Ring app. Then, using the Ring App, you tap the three-bar (hamburger) icon in the upper left corner and select “Set Up a Device.” Select Mailbox Sensor and follow the instructions. You’ll test and name the sensor as part of the configuration. I recommend setting up the Ring Bridge and mailbox sensor before you install it for testing purposes. The app even has instructions for how to install the sensor in your mailbox.
Testing out how well it works
The sensor worked well in my testing. Every time I opened the mailbox the app sent me a mailbox opened notification. The app allows you to adjust the sensitivity of the motion detector in case you are getting false readings or missing mailbox opening events. I have mine set to the highest sensitivity level because it’s in the back of the mailbox.
Since my mailbox is across the street, I worried that the postal worker’s vehicle would block the signal, but in my testing, it works extremely well.
Advanced: Integration with Home Assistant
Aside from price, the main reason I bought the Ring Mailbox sensor over other options was that I knew I could integrate it with Home Assistant. Although Home Assistant has a native Ring integration, at the time of writing this article it doesn’t support Ring’s mailbox sensor. But, there is another way, using MQTT.
If you are going to use the method I’m about to describe, you’ll need to have a working MQTT broker set up. That’s beyond the scope of this article, but I wrote an article about setting up MQTT with Docker and Home Assistant that you can reference. Also, although you don’t have to use Docker, I will in these instructions. Docker is great! I also wrote an article about Docker setup.
I use ring-mqtt to integrate the mailbox sensor with Home Assistant. The documentation on Github is comprehensive, but I’ll summarize what I did to install and configure it. This all assumes you’ve already set up your Ring Bridge.
Note: If you use HASSIO, you can install this using the Home Assistant Community Add-ons repository.
Step 1: Download the refresh token
Ring requires two-factor authentication which ring-mqtt supports by getting a Ring refresh token. To do this, execute the following command on your docker host:
docker run -it --rm --entrypoint /app/ring-mqtt/node_modules/ring-client-api/ring-auth-cli.js tsightler/ring-mqtt
Enter your ring credentials to get your Ring token and save the token for use in your ring-mqtt Docker container in the next step.
Step 2: Start the ring-mqtt container
This consists of a simple Docker run command:
docker run -d --name=ring_mqtt --mount type=bind,source=/storage/ring-mqtt,target=/data -e "MQTTHOST=host_name" -e "MQTTUSER=mqtt_user" -e "MQ
TTPASSWORD=mqtt_password" -e "RINGTOKEN=ring_refreshtoken" tsightler/ring-mqtt --restart always
There are few parameters you will need to customize for your Docker container:
- You’ll need to define a persistent storage location that works for your Docker host. In my installation above, I use
/storage/ring-mqtt. - You’ll need to supply your MQTT broker’s IP/hostname and its username and password if your broker requires them. You can also supply a port using
-e "MQTTPORT=port_number"if your broker’s port isn’t the default 1883. - Make sure to input the Ring refresh token that you saved for from step 1
Step 3: Locate the Home Assistant Ring Mailbox Sensor entities
Assuming you have MQTT discovery turned on in your Home Assistant configuration, you should now see a new binary_sensor indicating whether motion has been detected in your mailbox and another sensor that tracks its battery level in your MQTT integration. The names of my sensors are binary_sensor.mailbox_motion and sensor.mailbox_info.
Step 4: Home Assistant mailbox sensor automations
I decided I wanted to make a couple of lights turn on in the house as well as announce audibly through my Nest Hub Max that the mail has arrived. I’d also like to automatically turn the indicator lights off when I pick up the mail from the mailbox. I’m using lights that are not used during the day, so the only way they would be on is if this automation ran (plus I make one of the lights a specific color to indicate the mail arrived). I implemented this using an input_boolean, two scripts, and two automations.
First I created an input_boolean called input_boolean.mailbox_opened_today. This is set to “on” the first time a mailbox is opened (when mail is delivered). Opening it up after that means someone is getting the mail out of the mailbox. Here is the primary automation that notifies me when the mail arrives and when someone has picked it up:
- id: mailbox_opened
  alias: Mailbox Opened
  trigger:
  - platform: state
    entity_id: binary_sensor.mailbox_motion
    from: 'off'
    to: 'on'
  action:
    - service_template: >
        {% if states('input_boolean.mailbox_opened_today') == 'off' %}
         script.mail_delivered_notification
        {% else %}
         script.mail_picked_up_notification
        {% endif %}
    - service: input_boolean.turn_on
      target:
        entity_id: input_boolean.mailbox_opened_today
    - delay: 60 # make sure this isn't called again while the mailman is still there
Motion in the mailbox triggers this automation. If this is the first time today there is motion it runs the mail delivered script, otherwise, it runs the mail picked up script. The contents of the mail_delivered_notification script are:
mail_delivered_notification:
  alias: Mail Deliveried Notification
  sequence:
  - service: notify.telegram_main
    data_template:
      message: 'The mail has arrived'
  - service: light.turn_on
    data:
      entity_id: light.cylinderlamp
      color_name: purple
  - service: light.turn_on
    entity_id:
      - light.cylinderlamp
      - light.shellyvintagebig
  - service: media_player.volume_set
    data:
      entity_id: media_player.kitchen_nest_hub_max
      volume_level: "0.5"
  - service: tts.cloud_say
    data:
      entity_id: media_player.kitchen_nest_hub_max
      message: Your mail has arrived.
      cache: true
      language: en-GB
      options:
        gender: female
  - delay: '00:00:10'
  - service: media_player.turn_off
    entity_id: media_player.kitchen_nest_hub_max
This script sends me a Telegram notification, turns on a lamp in our family room (and turns it purple), and turns on a lamp in my office for visual notification that mail has arrived. It also announces it on our Nest Hub Max.
mail_picked_up_notification:
  alias: Mail Picked Up Notification
  sequence:
  - service: notify.telegram_main
    data_template:
      message: 'The mail has been picked up'
  - service: light.turn_off
    entity_id:
      - light.cylinderlamp
      - light.shellyvintagebig
This script sends a Telegram notification and turns the lights back off.
I need one more automation to make this all work. Each day I need to reset the mailbox opened input boolean back to off to indicate the mail hasn’t been delivered that day yet:
- id: reset_mailbox_boolean
  alias: Reset Mailbox Boolean
  initial_state: 'true'
  trigger:
  - platform: time
    at: "00:00:00"
  action:
    - service: input_boolean.turn_off
      target:
        entity_id: input_boolean.mailbox_opened_today
Final thoughts
| Pros | Cons |
|---|---|
| Reliable | Bulky |
| Works over long ranges | May require drilling into your mailbox |
| Integrates with Home Assistant | Need cloud for set up (Ring Bridge) |
| Inexpensive | |
| Notifications are timely |
Overall, I’m very happy with this solution. Over the month or so I’ve had it, I think it has only missed one notification. It’s great knowing when the mail has been delivered so I can make sure no mail thieves get to my mail before I do.

My mailbox is about 100 feet from my front door with a small park between my house and the mailbox. The time of my mail delivery is quite variable and can be after 8PM. I had planned a roll-your-own mailbox sensor running on an ESP8266 and using RF modules to communicate with another ESP8266 that would send MQTT messages. My testing was not going well, so when Amazon announced a mailbox sensor I ordered the device about Christmas time.
I quickly concluded that the Ring-MQTT application was my best option. I already run Home Assistant and MQTT on my Docker host. Kudos to tsightler for developing and improving this package. The Ring application on my cell phone provides notification when motion is detected in the mailbox. I also have the ring.com web application send a ‘you’ve got mail’ message to Alexa on the Echo in our kitchen.
Range was a problem for me. My Ring mailbox sensor could not reliably connect to the bridge until I moved the Ring bridge from just inside the front door to inside a plastic box that protects an outlet on my front porch. The bridge is the ‘weakest link’ in the system. It is multiple pieces connected by a USB cable not officially supported for outdoor use, but unusable inside.
The Ring mailbox sensor ‘eats’ batteries. I barely get 6 weeks of use from the 3 AAA batteries. Disconnecting the unit from the back of the mailbox is pain. I hate the battery life and I hate the bridge. This Rube Goldberg contraption is a fail for me.
I hear you about the battery life. I’m going to have to replace mine soon. It’s lasted a few months for me, but I can see that it is low now, and that I will have to replace it every few months. But other than that, I’ve been lucky enough for it to be reliable for me even on the inside of my house.