This page contains affiliate links. If you purchase an item using an affiliate link I will receive a small commission at no cost to you. Affiliates do not influence my recommendations. Read my disclosures for more information.
LED strips and strings are a great way to spice up your home and holiday decorations. I recently got into Holiday LEDs using a nodeMCU chip and the WLED firmware. That was fun and inexpensive, but maybe not for everyone. Some of you may be looking for more of an off-the-shelf controller to use with your LED lights, and that’s where the Shelly RGBW2 comes in. I recently had the opportunity to try it out and here are my thoughts.
Note: Amazon is often out of stock. You can buy the Shelly RGBW2 controller directly from Shelly.
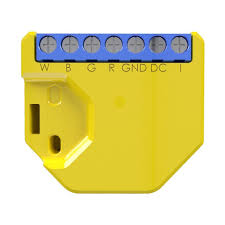
Table of Contents
What is the Shelly RGBW2?
I have been using Shelly 1 relays to automate various things around the house, like my fireplace, garage doors, and light switches. I like the Shelly 1 because it is small and supports local controls protocols like REST and MQTT so I don’t need the cloud to use it. Because of these standards-based APIs, they easily integrate with my smart hub, Home Assistant.
The Shelly RGBW2 follows the same mold. It’s a small form factor ( little bigger than a quarter and a little over half an inch thick) and supports local control. It works with white, RGB and RGBW LED strips that are 12 or 24V. However, it does not work with 5V LED strips, and it cannot control individually addressable strips. It can control 4 white light strips at once. For my review, I purchased this 12V RGBW LED strip and this 12V power supply to put some LED lights under my son’s bed (it’s a short run, and doesn’t require much power).
Wiring up the Shelly RGBW2
Wiring the Shelly RGBW2 to power and the RGBW LED strip is pretty straight forward. Below is the wiring diagram:

Basically, you connect the red, green, blue, and white connections from the LED strip to their corresponding inputs on the Shelly RGBW2. Then connect power and ground from wherever your source is to the RGBW2. You will also need to supply power to the LED strip from that same source. I didn’t connect the switch because I plan to control the LEDs from Home Assistant or directly via the Shelly. Here is what mine looks like:

Next up, I just have to configure the Shelly RGBW2, add it to Home Assistant, and cut the LED strip to fit under the bed.
Shelly RGBW2 Configuration
Setting up the Shelly RGBW2 is pretty straight forward. You could use the app, but I just use the built-in web server, just like I did with my Shelly 1s. Once you supply power to an unconfigured Shelly it will boot up in access point mode. Using a mobile device, connect directly to the Shelly. The WiFi network name will be shellyrgbw2-xxxxxx, where the xxxxxx is specific to the Shelly RGBW2 you own. Then, open up a web browser and connect to http://192.168.33.1. From there you’ll get a user interface that looks like:
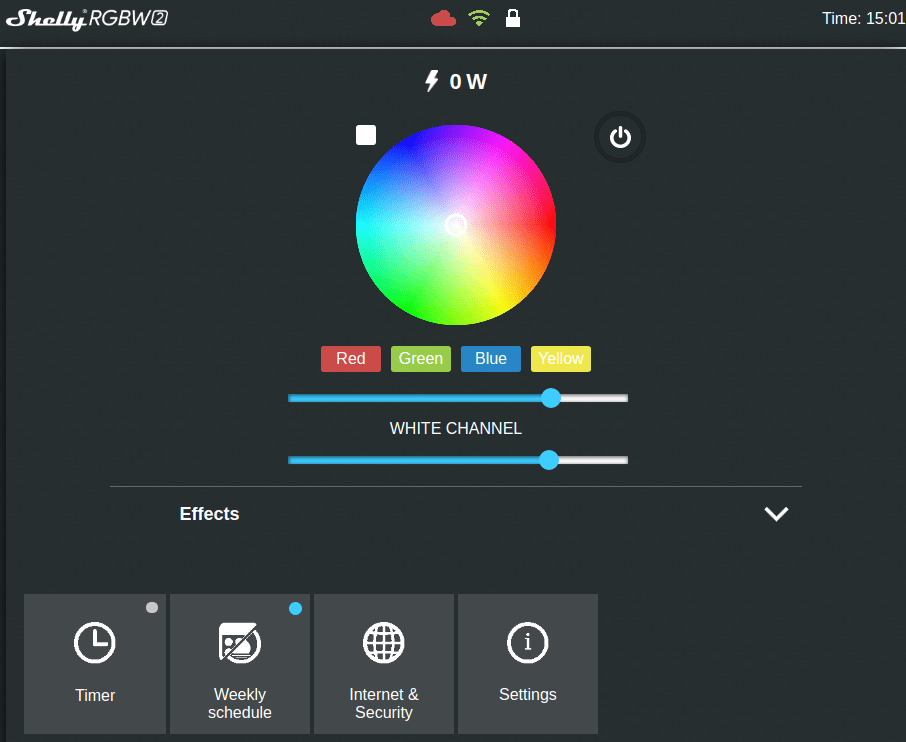
From there select Internet & Security and configure your Shelly to connect to your WiFi network. I strongly recommend you use a static IP or a static lease from your router.
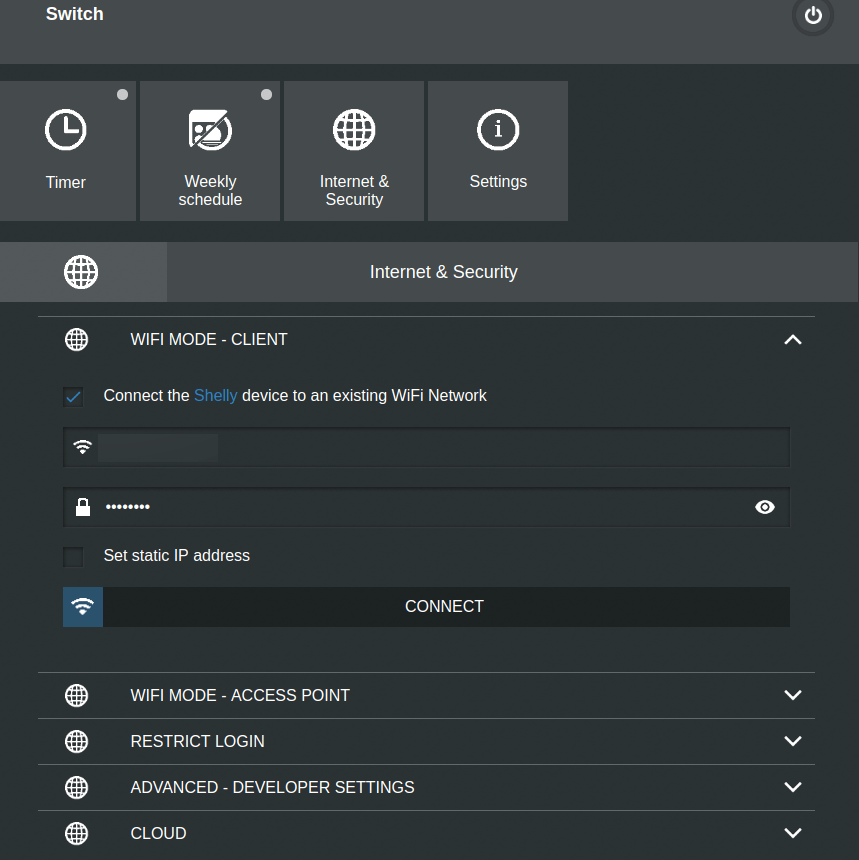
After hitting save, your Shelly will reboot and be controllable from your home network. You could just control it using the app or internal web server. They also allow you to set up timers and schedules. However, if you’re interested in configuring your Shelly to work with Home Assistant via MQTT, read on.
Shelly Home Assistant Configuration
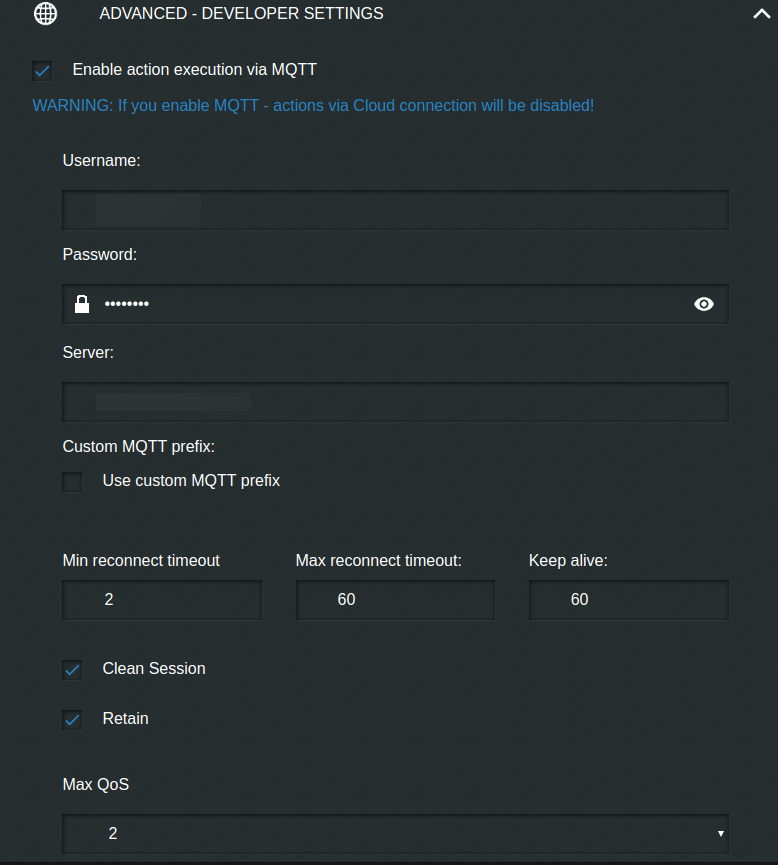
Before you can use the Shelly with Home Assistant, you need to make sure you have an MQTT broker integrated with Home Assistant. Next, you need to configure the Shelly RGBW2 controller’s MQTT settings. In the Shelly interface go to Internet & Security->ADVANCED – DEVELOPER SETTINGS and:
- Click the checkmark to “Enable action execution via MQTT” (note this will disable cloud access. It’s one or the other).
- If you secured your MQTT broker, enter its username and password
- Under “Server:” enter the IP address of your MQTT broker along with its port (usually 1883). Separate the IP address and port with a colon.
- Save these settings.
I won’t reinvent the wheel on configuring the Shelly within Home Assistant. Just follow the instructions (and code) from Rob from the Hookup. You will need to know the MQTT topic of your Shelly. By default, it is the same as what the access point name was that you originally connected to. But in case you forgot, it’s simply shellyrgbw2-xxxxxx where xxxxxx is the device ID (the last 6 characters of the MAC address). You can find this is in few places, including the Shelly RGBW2 interface under Settings->DEVICE INFO. For convenience, I’ve included the YAML you’ll need to add here:
light:
  - platform: mqtt
    schema: template
    name: "LEDstrip MQTT"
    command_topic: "shellies/shellyrgbw2-xxxxxx/color/0/set"
    state_topic: "shellies/shellyrgbw2-xxxxxx/color/0/status"
    effect_list:
      - 0
      - 1
      - 2
      - 3
      - 4
      - 5
      - 6
    command_on_template: >
      {"turn": "on"
      {%%- if brightness is defined -%%}
      , "gain": {{brightness | float | multiply(0.3922) | round(0)}}
      {%%- endif -%%}
      {%%- if red is defined and green is defined and blue is defined -%%}
      , "red": {{ red }}, "green": {{ green }}, "blue": {{ blue }}
      {%%- endif -%%}
      {%%- if white_value is defined -%%}
      , "white": {{ white_value }}
      {%%- endif -%%}
      {%%- if effect is defined -%%}
      , "effect": {{ effect }}
      {%%- endif -%%}
      }
    command_off_template: '{"turn":"off"}'
    state_template: "{%% if value_json.ison %%}on{%% else %%}off{%% endif %%}"
    brightness_template: "{{ value_json.gain | float | multiply(2.55) | round(0) }}"
    red_template: '{{ value_json.red }}'
    green_template: '{{ value_json.green }}'
    blue_template: '{{ value_json.blue }}'
    white_value_template: '{{ value_json.white }}'
    effect_template: '{{ value_json.effect }}'
    qos: 2
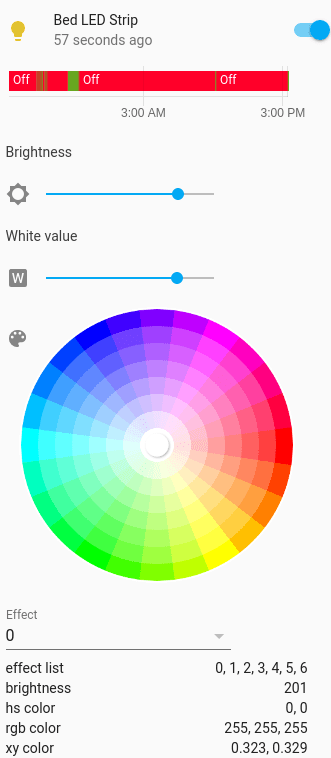
After your restart Home Assistant you’ll have a UI like the following to control your LED strip:
BONUS: Making your own remote control
I like to make things pretty easy for my son. Since I don’t allow him to keep mobile devices in his room he can’t directly use Home Assistant to control the lights. I bought an inexpensive radio frequency (RF) Remote control for him to use to turn the lights on and off, set an effect, and change some of the colors. If you want to know more about how I integrate RF devices into Home Assistant, be sure to check out my article on using a Sonoff RF Bridge to expand your smarthome. I created six automations that he can trigger from the remote:
- id: toggle_led
  alias: Toggle LED
  initial_state: 'true'
  trigger:
    platform: mqtt
    topic: 'home/LEDToggle'
    payload: "ON"
  action:
  - service: light.toggle
    entity_id: light.bed_led_strip

- id: led_cycle
  alias: LED Cycle
  initial_state: 'true'
  trigger:
    platform: mqtt
    topic: 'home/LEDCycle'
    payload: "ON"
  action:
  - service: light.turn_on
    data:
      entity_id: light.bed_led_strip
      effect: 2

- id: led_red
  alias: LED Red
  initial_state: 'true'
  trigger:
    platform: mqtt
    topic: 'home/LEDRed'
    payload: "ON"
  action:
  - service: light.turn_on
    data:
      entity_id: light.bed_led_strip
      effect: 0
      rgb_color: [255,0,0]
      white_value: 0

- id: led_green
  alias: LED Green
  initial_state: 'true'
  trigger:
    platform: mqtt
    topic: 'home/LEDGreen'
    payload: "ON"
  action:
  - service: light.turn_on
    data:
      entity_id: light.bed_led_strip
      effect: 0
      rgb_color: [0,255,0]
      white_value: 0

- id: led_blue
  alias: LED Blue
  initial_state: 'true'
  trigger:
    platform: mqtt
    topic: 'home/LEDBlue'
    payload: "ON"
  action:
  - service: light.turn_on
    data:
      entity_id: light.bed_led_strip
      effect: 0
      rgb_color: [0,0,255]
      white_value: 0

- id: led_white
  alias: LED white
  initial_state: 'true'
  trigger:
    platform: mqtt
    topic: 'home/LEDWhite'
    payload: "ON"
  action:
  - service: light.turn_on
    data:
      entity_id: light.bed_led_strip
      effect: 0
      rgb_color: [0,0,0]
      white_value: 200
The first automation simply toggles the lights on and off. The second automation sets the effect to 2, which is an effect that cycles through different colors. The last four automations simply change the colors to red, green, blue, and white. These all use MQTT triggers via my Sonoff RF Bridge MQTT integration. You can easily change the colors and effects to something else if you desire.
Final Thoughts
This was about as easy as it gets. The Shelly RGBW2 is inexpensive, small, and easy to integrate with other systems. I highly recommend it if you aren’t looking to control individually addressable LEDs. If you want to read more about my LED projects and see videos of the results (including using the Shelly RGBW2) check out my LED project planning article.