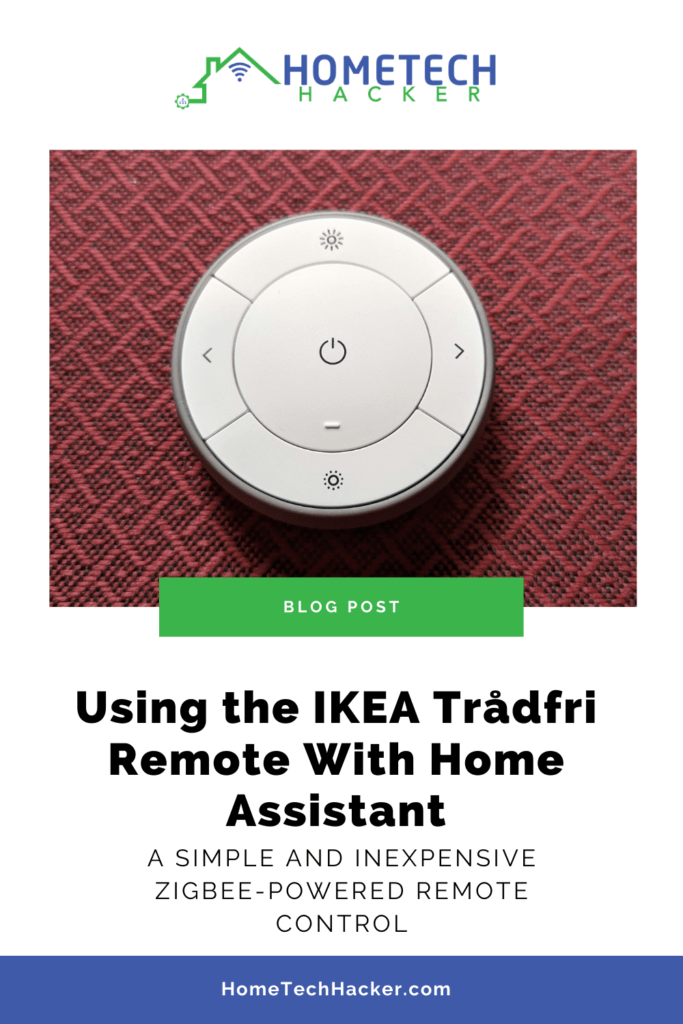
Although I no longer need the perfect remote control, I do find some simple remote controls useful around the house. One such place is my son’s bedroom. He has some LED light strips attached to his bed that he likes to dim, brighten, and change colors via a remote. As kids often do, he lost the remote I used to have for him. So, I was in search of another remote control. I wanted an inexpensive remote for fear it would get lost again. That’s when I came across the IKEA Trådfri Zigbee-powered remote. Here are my thoughts on the remote and how to integrate it with Home Assistant.
This page contains affiliate links. If you purchase an item using an affiliate link I will receive a small commission at no cost to you. Affiliates do not influence my recommendations. Read my disclosures for more information.
Table of Contents
Background
As I mentioned earlier, my son’s bed has an LED strip on the bottom of the frame. He likes having it come on and night and being able to change colors. It also serves as a night light. It’s powered by a Shelly RGBW2 controller and works great! Here’s a video of it in action:
Somewhere along the way his remote to control this light went missing. Sure he could use voice control, or even a phone, but a remote is simpler and quieter than voice control. A new remote it is.
Why I chose the IKEA Trådfri remote
We only need a few buttons to control the LEDs. I was open to RF, Zigbee, and Z-Wave remotes originally. Although I have working RF remotes, I decided if I was going to go with something new, I stick with a true smart home protocol like Zigbee or Z-Wave. Some of the ones I considered are:
- FIBARO KeyFob Remote (Z-Wave)
- ZRC-90 Scene Master (Z-Wave)
- Aeotec WallMote Quad (Z-Wave)
- Linkind 5-Key Smart Tap Switch (Zigbee)
- Philips Hue v2 Smart Dimmer Switch (Zigbee)
- IKEA Trådfri Remote Control (Zigbee)
I have many more Z-Wave devices than Zigbee, but these Z-Wave remotes were more expensive without offering a lot of advantages. So I went with the least expensive remote at the time of purchase — The IKEA Trådfri remote. It has 5 buttons and can work with short and long presses, effectively giving me 10 buttons, which is more than I actually need. Also, it is pretty compact.
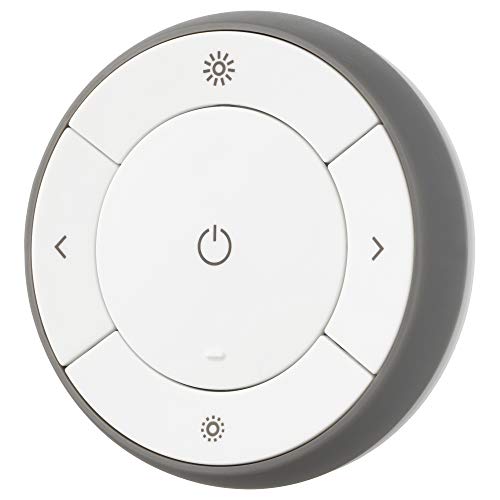
- You can use TRÅDFRI remote to control up to 10 LED light bulbs at a time - dim, switch on and off, choose colors and step by step change from warm to cold light.
- You can use TRÅDFRI gateway and app to create several groups of light sources and control them in different ways.
- The remote control works with TRÅDFRI bulbs.
- With TRÅDFRI remote control you can dim your lights without a hardwired installation.
- A magnet makes it easy to attach the remote control to the wall bracket.

Pairing the IKEA Trådfri remote with Home Assistant
First, you need to have a Zigbee adapter like the Nortek HUSBZB-1 (which I have, and it also does Z-Wave) or the ConBee II. You can learn from my experience setting up Zigbee in Home Assistant or follow the official Home Assistant documentation for Zigbee.
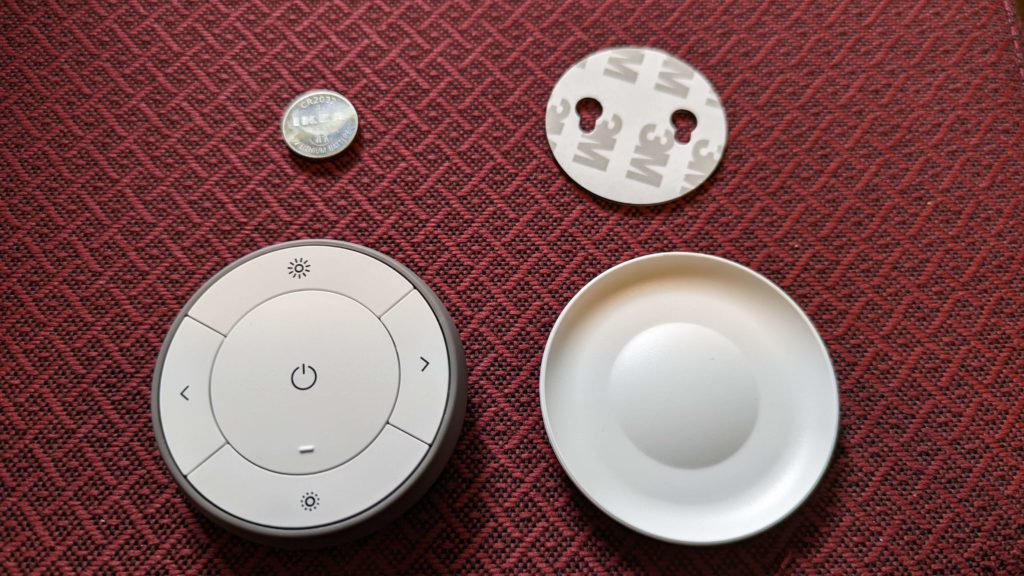
To pair the remote insert the battery and then press the sync button on the inside of the back case four times in five seconds to put the Trådfri remote in pairing mode. You should now see a red link blinking on the top of the power button on the front side of the remote.
Now, head over to Settings->Devices & Services in your Home Assistant installation. Find your ZHA integration and press the + ADD DEVICE button at the bottom right of the screen. It should automatically find and pair the Trådfri remote, and you should see a screen similar to this:
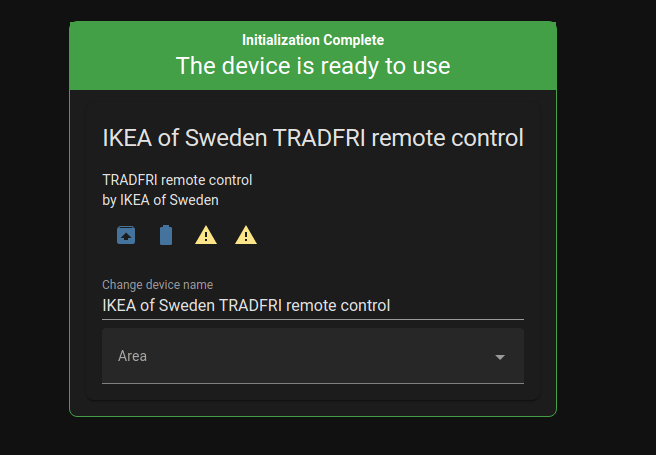
You may want to change the device name to something appropriate for your use.
Using the IKEA Trådfri remote to trigger actions
Now that the remote is recognized as part of the Home Assistant configuration it’s time to make the buttons do something. The easiest way to do this is to use a blueprint set up by Home Assistant user niro1987. You can learn more about the blueprint here, and the actual blueprint is on GitHub. You can use the “Import Blueprint” button on the information page, or you can go to Settings->Automations & Scenes->Blueprints screen in Home Assistant and import the GitHub URL using the import blueprint button at the bottom right.
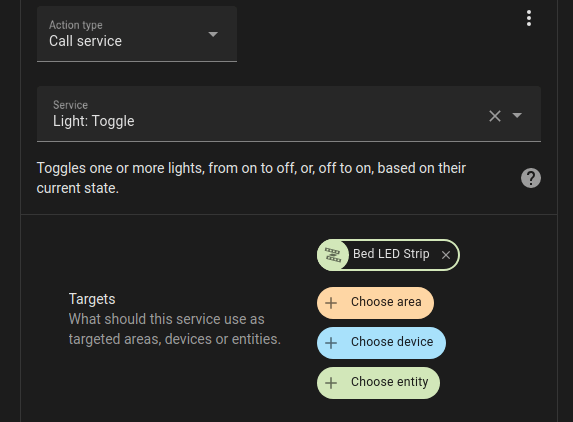
After you’ve imported the blueprint it’s time to configure the automations. From the Home Assistant Blueprint screen, select CREATE AUTOMATION next to your “ZHA – IKEA TRADFRI – 5 Button Remote – Custom Actions” blueprint. This will give you a screen where you can configure short and long presses of the button to call services, play media, fire events, and more, and you don’t even have to write any YAML. I set buttons to toggle the bed LED lights on and off, dim and brighten them, and select different colors and lighting effects. Everything worked perfectly. Here’s the action I configured for toggling the bed LED:
Final thoughts
All in all, this was pretty easy to implement, and the button works wonderfully. When I’m looking for simple remotes for anything in my smart home controlled by Home Assistant, I will probably get another one of these remotes.
Do you use any buttons or remotes with Home Assistant? Which one and why? Let me know in the comments or on Twitter.
Interested in supporting HomeTechHacker?
Have you found the content on this site useful? If so, are you interested in supporting me and this site? There’s no obligation of course, but I would really appreciate any support you can give. Below are a few ways you can show support:
- Share this site with your friends and on social media (use the sharing links at the end of this page for your convenience)
- Subscribe to this site
- Purchase one of my books, The Personal Cybersecurity Manual, The Home Network Manual or The Smart Home Manual, for yourself or as a gift
- Put a link to HomeTechHacker on a site you have access to. Be sure to let me know about it!
- Enroll in HomeTechHacker Academy for free and premium online home technology courses.
- Reach out to me via my contact page or Twitter and let me know something I should write about
- Shop at Amazon through my affiliate links and ads on these pages. See my disclosures for more details about affiliate links. You can also just shop from one of the links below:
- HomeTechHacker Shop: This is a listing of products that I use, have reviewed, and that I recommend
- HomeTechHacker Technology Advisor: This suite of tools will give you customized home technology product recommendations based on your needs
- My Amazon affiliate link: Just click on this link to go to Amazon and shop
Thank you! I really appreciate it!