
I love Home Assistant, and it truly is the central intelligence of my smart home. I currently run my production instance of Home Assistant in a Python virtual environment in an Ubuntu Proxmox VM, but I’ve been considering moving it to a less hands-on solution, like HassOS or a supervised installation. I’ve looked into Home Assistant hardware before, but not the Dusun Home Assistant Gateway. How does the Dusun compare to other hardware options? What type of installation does it have? I’ll answer these questions and more in this article.
Editor’s Note: I received the Dusun Home Assistant Gateway free of charge in exchange for a review. However, this in no way affects my review. I always give an honest opinion.
Background
Dusun is an IoT gateway hardware and solutions supplier. They make a series of Gateways that support various protocols like Zigbee, Z-Wave, LoRaWAN, GPS, Matter, and more. Their gateways are capable of running Home Assistant, OpenHAB, Domoticz, and other smart home hub software.
They make a variety of Bluetooth and Zigbee sensors in addition to their IoT gateways. Their gateway hardware can be used for other purposes like routers and access points.
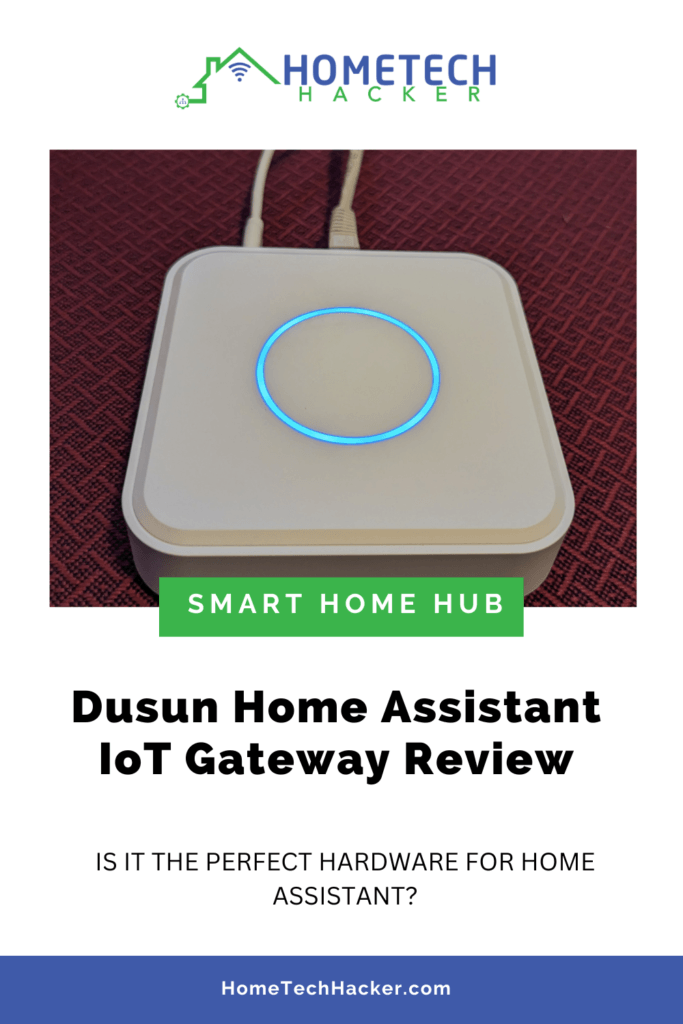
Dusun Home Assistant IoT Gateway specs
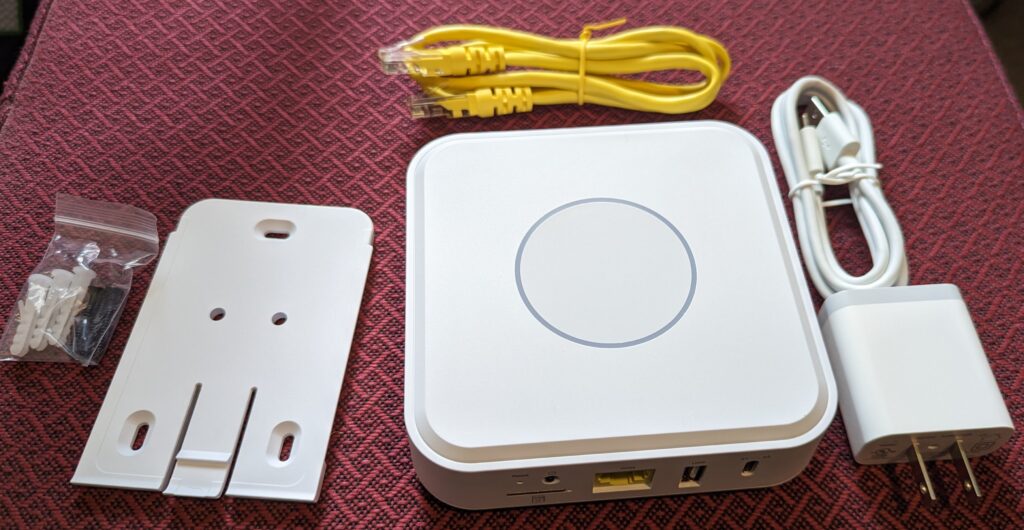
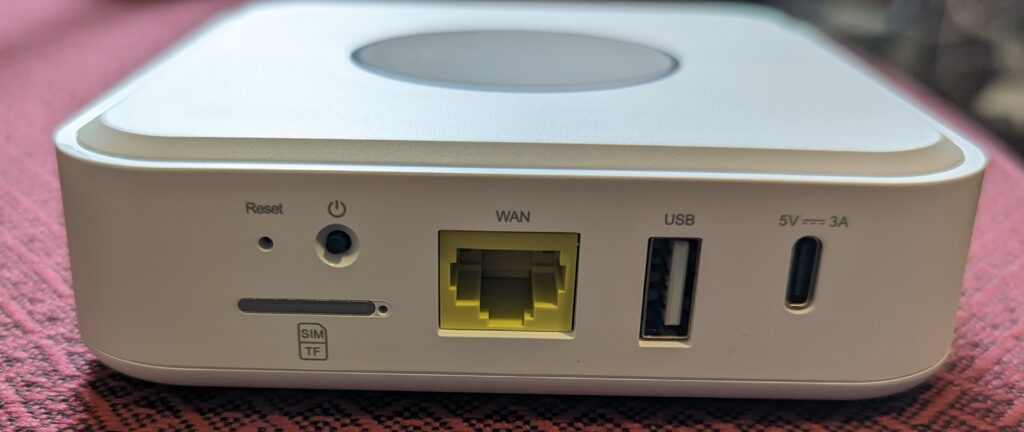
The model I have is the Dusun DSGW-210. Below are its specs:
| Power Supply | USB-C 5V/3 Amps |
| Networking | 10/100 Ethernet port, Wi-Fi 802.11 ac/g/b/n |
| CPU | Quad-core Cortex A35 |
| SD Card | up to 128 GB |
| RAM | 4 GB |
| eMMC | 16 GB |
| USB | 1 USB 2.0 port |
| Sim Card Slot | 1 |
| Wireless Protocols | Wi-Fi, Zigbee, Z-Wave, Bluetooth |
| OS | Linux (Debian) |
| Home Assistant Install Type | Supervised |
Overall, the device feels premium. As the desire would be to use this as a Home Assistant smart hub it doesn’t need to have a lot of ports. Although 10/100 and USB 2.0 are fast enough for a smart home hub, I would prefer a gigabit connection and USB 3.0.
But, it has Zigbee, Z-Wave, Bluetooth — everything you need for a very robust Home Assistant environment.
First boot up
So, the first thing to note about this device is that it doesn’t come with any instructions. At all! No specs, no quick start guide, and no manual. So, you have to know a little bit about Home Assistant to get started.
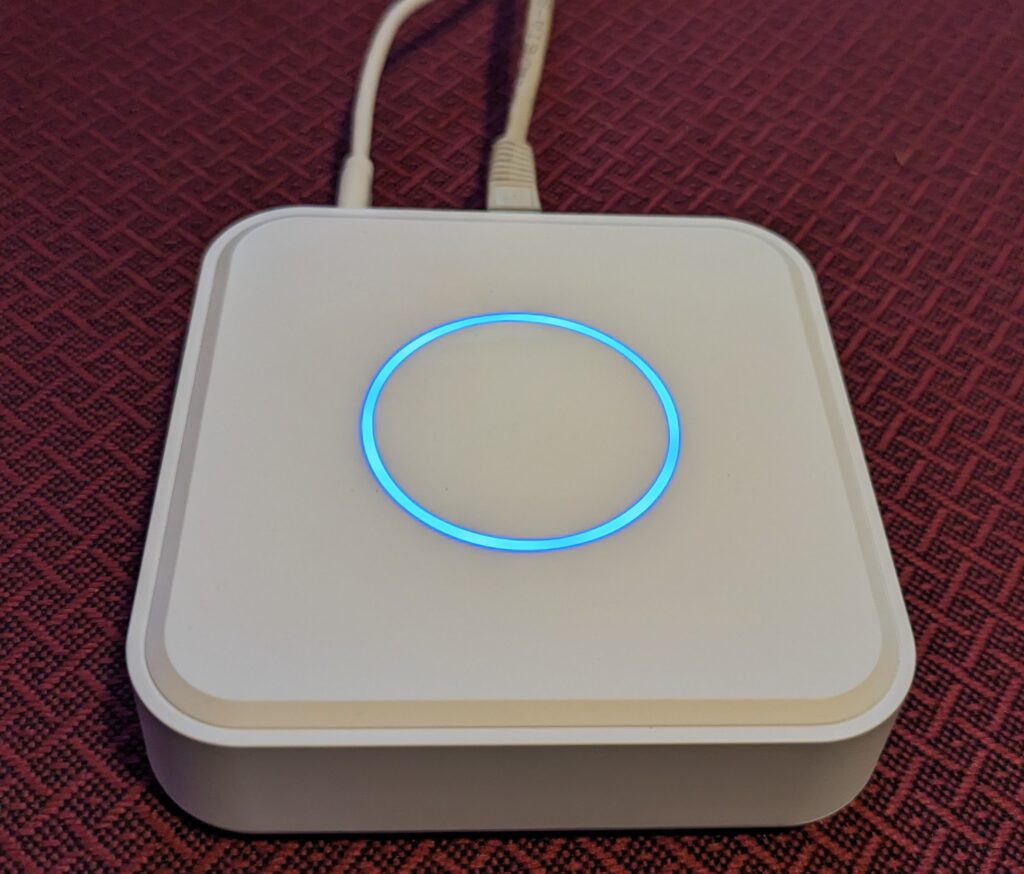
On startup, the led light ring on top of the Dusun glows red. About a minute or two later it turns blue and based on my testing, I think this is when it is ready to use.
Without instructions, some may need help figuring out how to connect to this device. What’s the IP address? What URL do I connect to? Do I use an app?
In my case, I have pfSense and Graylog notify me when I get a new DHCP reservation on my network. I then went into my pfSense user interface and gave the device an IP reservation and a hostname.
The default address to access a Home Assistant installation is HTTP://IPADDRESS:8123. And sure enough, going to that URL brought me to the Home Assistant account creation screen.
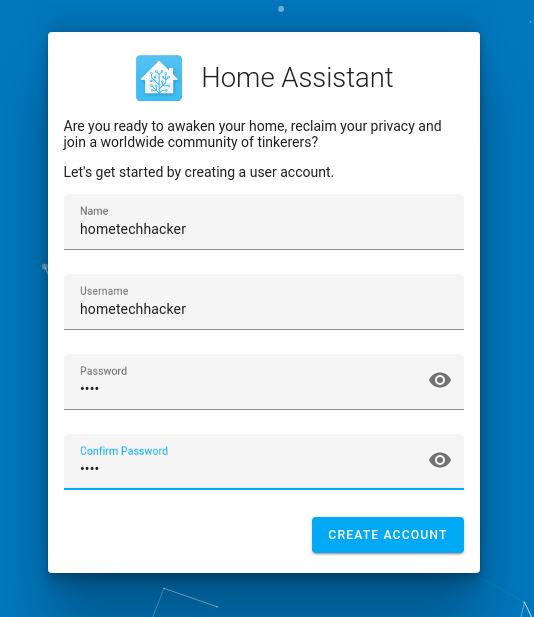
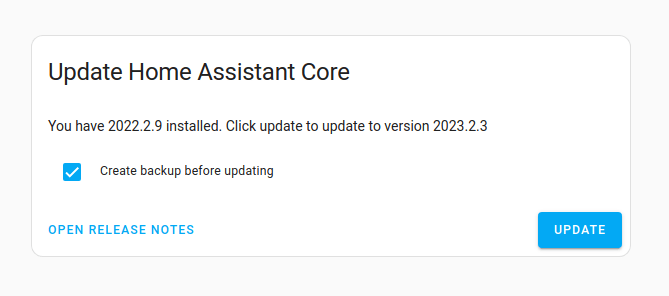
I created credentials and I was in! I went through the normal Home Assistant installation setup steps of picking currency, units (metric/imperial), time zone, etc. However, the first thing I noticed that I needed to do was update the Home Assistant installation. It was running 2022.2.9, and 2023.2.3 (a full year later!) was already out when I was testing this device.

Upgrading Home Assistant
As this is a supervised Home Assistant installation, upgrading can be done via the UI, and so off I went…
This process took a few minutes, the gateway rebooted, and everything looked ready for me to head into configurations… except Home Assistant indicated there was an issue needing repair.
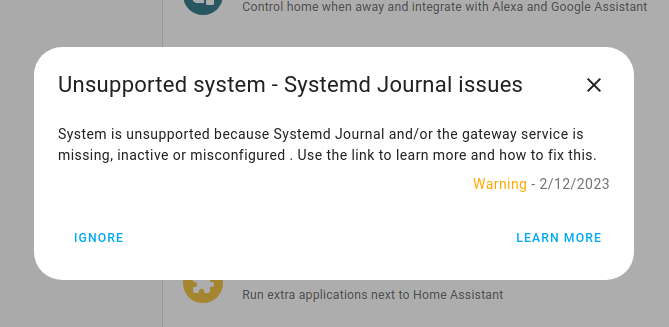
Now, the fix for this is simple enough. And, I should note that Home Assistant will run fine if you don’t fix this. You’ll just have reduced logging capabilities. But, to fix this, you need access to the host operating system.
SSH is running on the host box, but I didn’t know what credentials it used because of the lack of documentation. Luckily, root/root worked fine and I was able to fix this issue. However, if you keep this box, I recommend you change the password for that login.
Also, in fixing this, I noted the OS uses Chinese Debian mirrors, which were very slow for me. If you are comfortable doing so in Linux, you may want to change these mirrors to something more suitable for your location. Same with the DNS servers.
Basic configurations
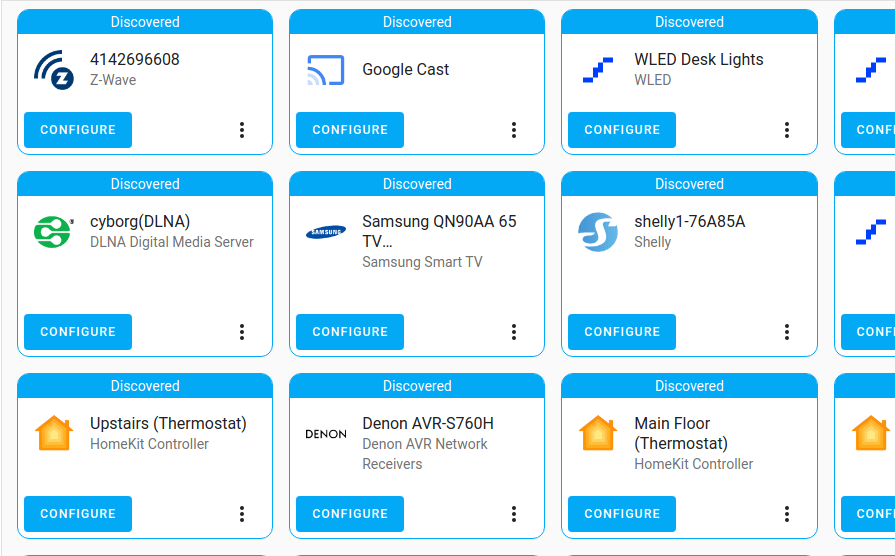
One of the things I love about Home Assistant is how comprehensive it is. It discovered pretty much everything I have installed and configured on my primary Home Assistant instance on its own. And, I could easily go and configure them
Most of the rest of what I have to say about this device is pretty standard for any Home Assistant installation, so I’m not going to go into detail. But there are a few things to know about getting Zigbee and Z-Wave setup
Z-Wave and Zigbee
Again, the lack of documentation for this device comes back to bite you when you want to configure Zigbee and Z-Wave. I started out trying Z-Wave.
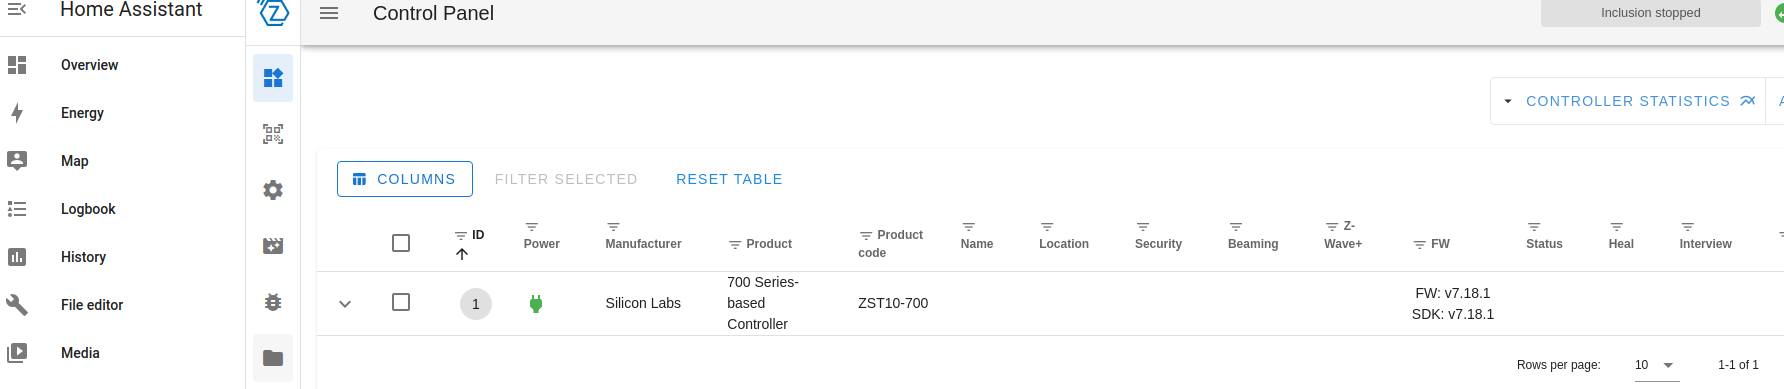
The first problem is that I don’t know what the Z-wave device is. After some trial and error, I discovered it was /dev/ttys1. After figuring that out, the Z-Wave configuration in Home Assistant is straightforward.
- Go to the add-on store and install the Z-Wave JS UI from the community add-ons.
- After it is installed, start the add-on and enable the “Show in sidebar” option.
- Click on the Z-Wave JS item in the Home Assistant sidebar and click on the configuration menu (the usual gear icon).
- Enter
/dev/ttsy1for the serial port. - Go through and click the refresh button next to the four key icon fields to make your Z-Wave keys for your devices to talk to the onboard Z-Wave controller. Make sure to hit save.
- When done, you’ll have a control panel that looks like the below (you may need to wait a minute and refresh):
Then, you can add Z-Wave devices as you normally would in Home Assistant.
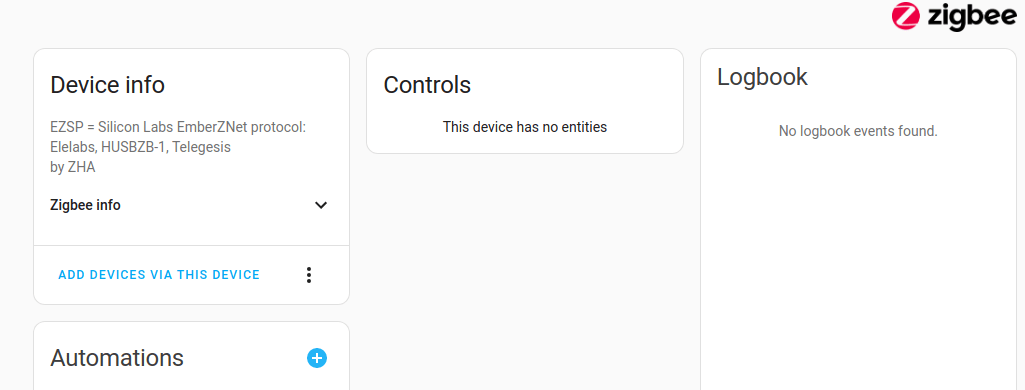
Zigbee suffers from the same lack of documentation. Through googling I found the Zigbee device to be /dev/ttyUSB0. I then followed the standard ZHA configuration instructions and was fully up and running.
Usage
I didn’t have any spare Zigbee devices so I could not test that. However, adding a Z-Wave smart plug and a siren proved to work just fine. I created a couple of simple automations and played with dashboards, all the things I normally do with Home Assistant. They all worked fine. At this point, everything is good to go for a full Home Assistant experience.
Although the device takes a couple of minutes to boot, once running, the Ui was snappy and the device was stable. I’ve had it running for a month straight at the time of writing this article.
Final thoughts
This is a good box to consider if you want a hassle-free Home Assistant installation that you don’t have to install yourself. It would greatly benefit from some better documentation and some instructions. However, it has everything you need for a great Home Assistant system.
Looks like a good deal; but I would be extremely cautious about putting a device like this (manufactured in China, using chinese mirrors for the OS) on my home network. I have had other devices from China attempt to “phone home” and report information about my network.
I’ve been using one of these boxes since december and i’ve watched its traffic closely. the box does not ‘phone home to china’.