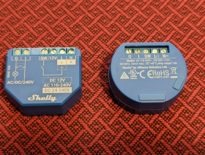
The original Shelly 1 has been my favorite and most versatile off-the-shelf smart home device for years. I’ve used it to add smarts to my fireplace, garage door (even for security+ 2.0 garage doors), and light switches. I have about a dozen Shelly 1s in my house. Shelly has upgraded the Shelly relay line. I went over some of the differences and improvements with Shelly Plus devices in a recent article. But has the wiring changed? Let’s compare how I wired the original Shelly 1 to how I would wire the Shelly Plus 1 for my previous projects.

- Shelly Plus 1 is a Wi-Fi & Bluetooth-operated smart relay switch with 1 channel, up to 16A that can be used also as a WiFi repeater. Shelly Plus 1 can be used to control any home appliances, electric circuits, and office equipment individually.
- Make any electrical appliance, garage door and irrigation system smart – No need to run additional cables, do unnecessary and expensive renovations or invest in smart appliances. You can now automate and control remotely every electrical appliance – even the old fan, room heater, pool system, door lock or doorbell, Garage Door and Irrigation System– with just a click or a shout.
- Safe and Easy to Install – Small enough to fit behind every wall switch or wall socket, Shelly Plus 1 is retrofitted and can be installed in less than 10 minutes. Enhanced safety and enhanced security MQTT and WSS support, TLS and custom certificates support.
This page contains affiliate links. If you purchase an item using an affiliate link I will receive a small commission at no cost to you. Affiliates do not influence my recommendations. Read my disclosures for more information.
Table of Contents
Shelly Plus 1 official wiring diagrams
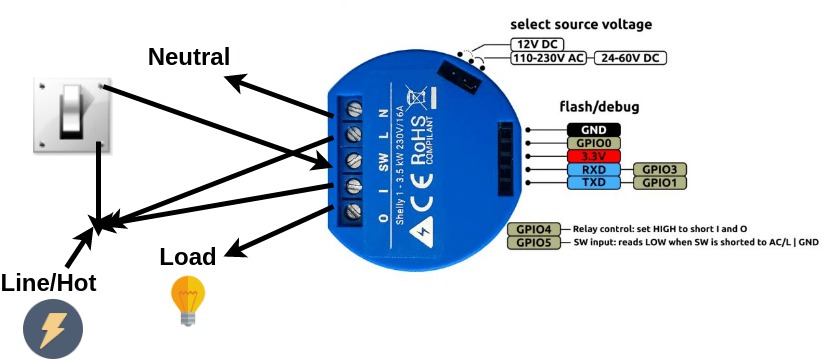
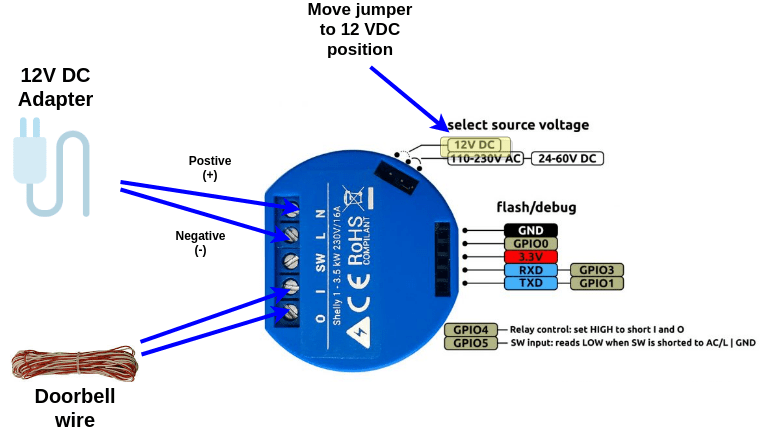
It’s always good to study the official wiring diagrams from Shelly before deciding how to wire your specific project. Here are the ones Shelly Provides:
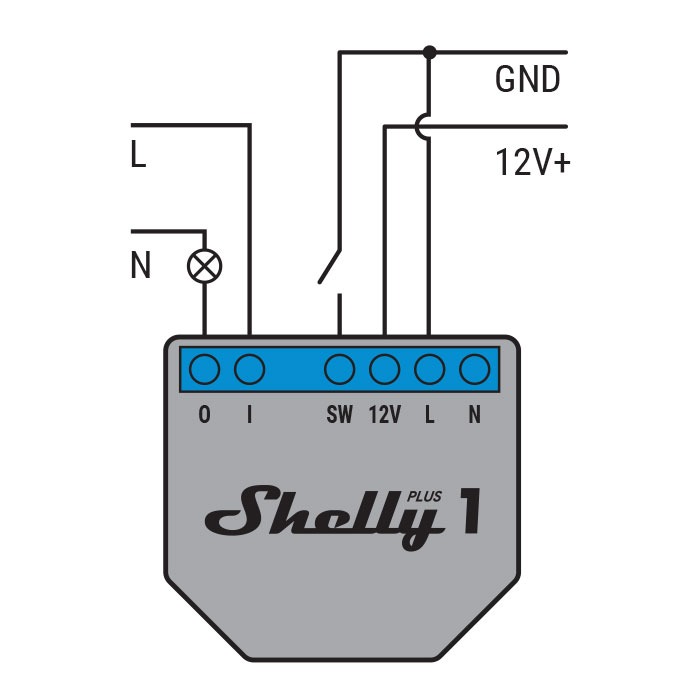
For my projects, only the AC mains voltage wiring (leftmost image) and DC adapter wiring (middle image) diagrams are relevant. I’ll adapt these diagrams directly to the projects where I’ve utilized the original Shelly.
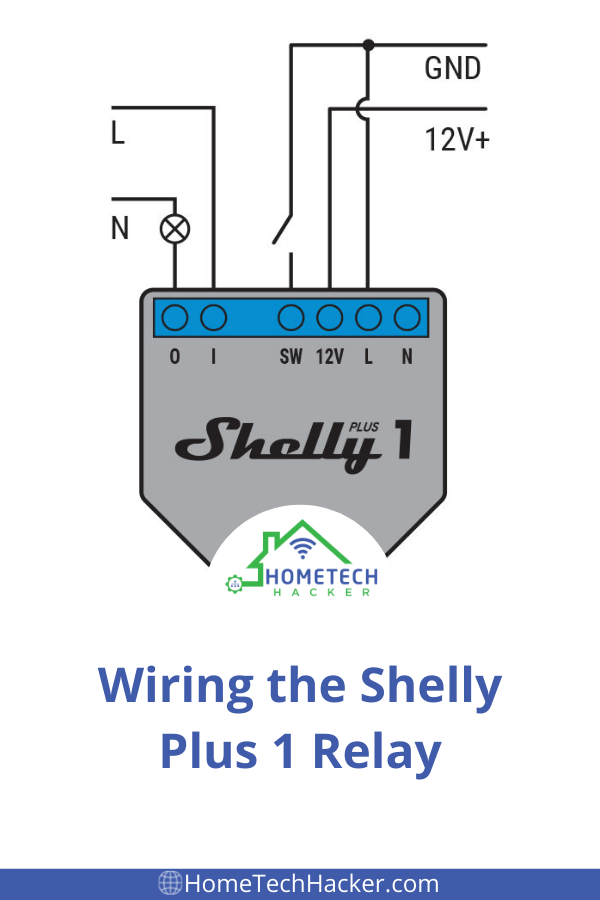
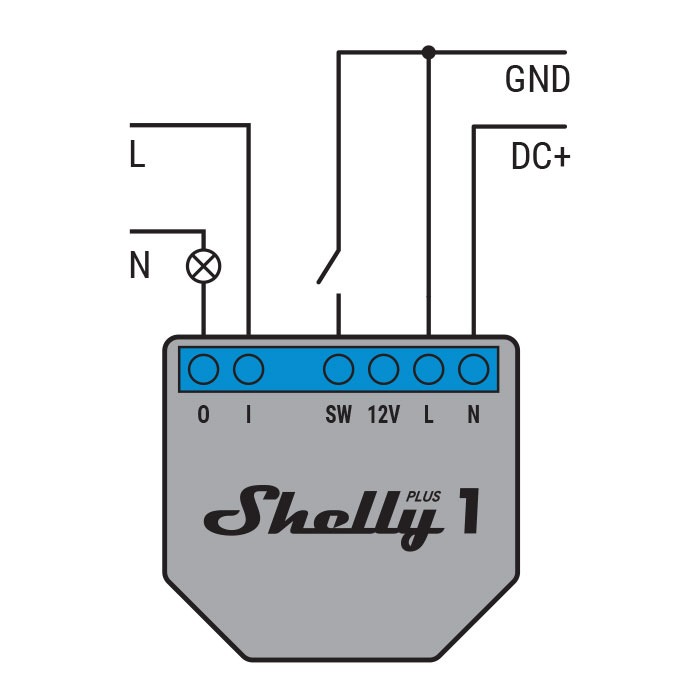
Shelly Light switch wiring
Wiring the Shelly Plus 1 or the original Shelly 1 requires dealing with mains voltage. Make sure you are comfortable and observe proper safety protocols (like turning off the power before wiring) when working with mains voltage. Here are diagrams comparing how to wire the two Shellys up:
As you can see, the wiring doesn’t change. You wire the Shelly Plus 1 the same as you did the original for controlling a light switch.

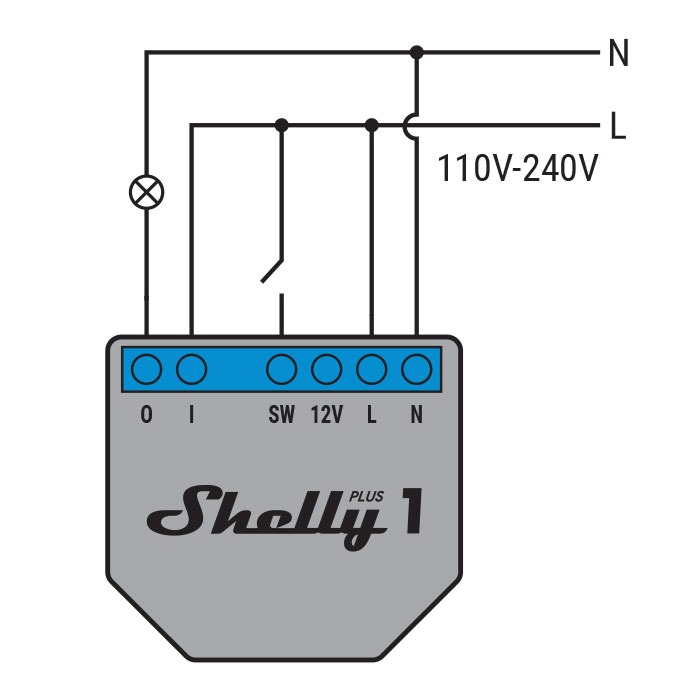
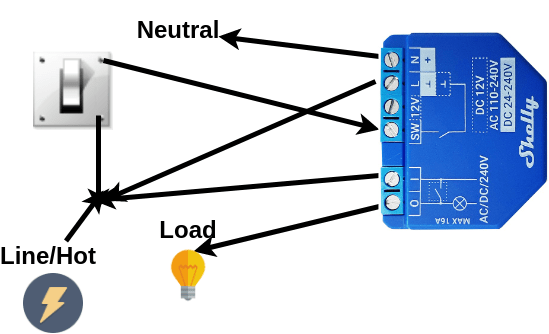
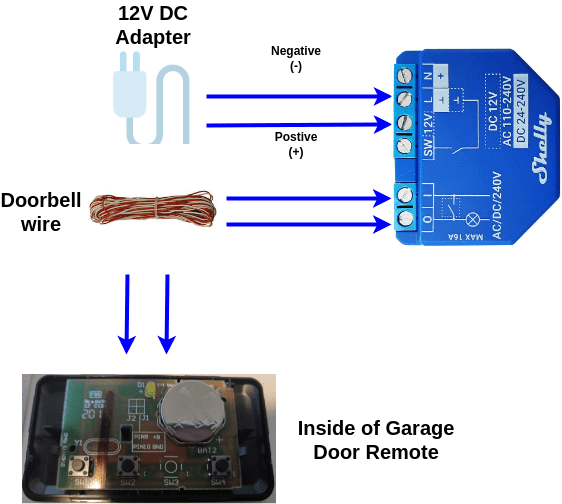
Shelly garage door wiring
Wiring the Shelly Plus 1 with DC voltage differs from how you would wire the original Shelly 1.
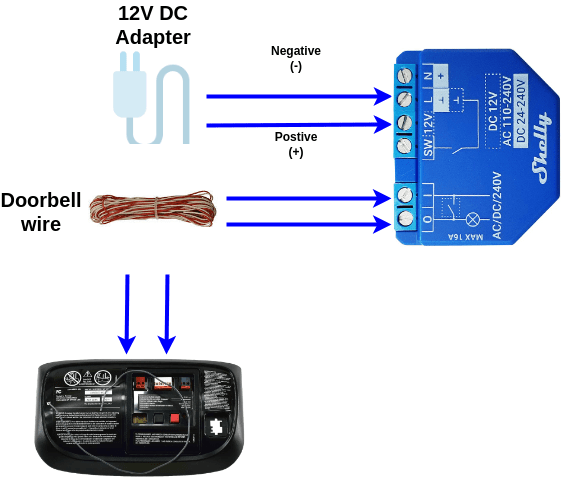
The main difference is that you no longer need to move a jumper to the right place to use DC voltage. The newer Shelly comes with a dedicated input for 12V+ DC connections.
I never provided a wiring diagram for Security+ 2.0 garage doors (which don’t work when you directly wire into the garage door opener unit). In that solution, I wire the Shelly relay to a garage door opener remote instead of the garage door. The wiring is close to the same as wiring the Shelly directly to the garage door, but here is a diagram for clarity.
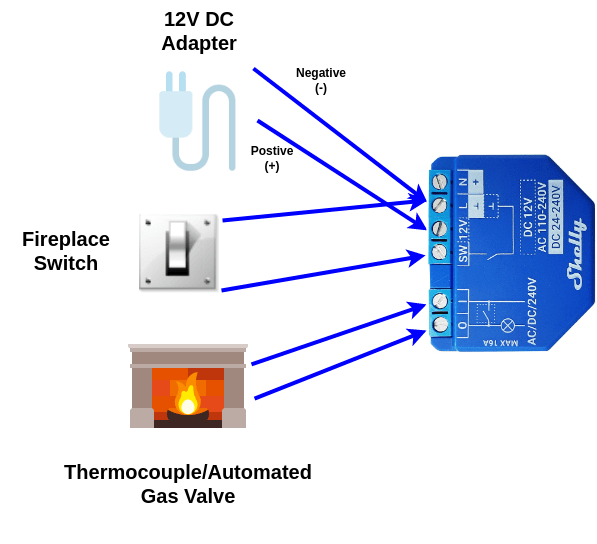
Shelly fireplace wiring
If you read my Shelly fireplace automation article you know I was careful and methodical about the wiring. I wanted to make sure everything I did was safe, and that I completely understood the fireplace wiring and how it works. After I convinced myself that I knew what I was doing, I successfully proceeded to wire the original Shelly in. Luckily, wiring with the new Shelly is pretty much the same:
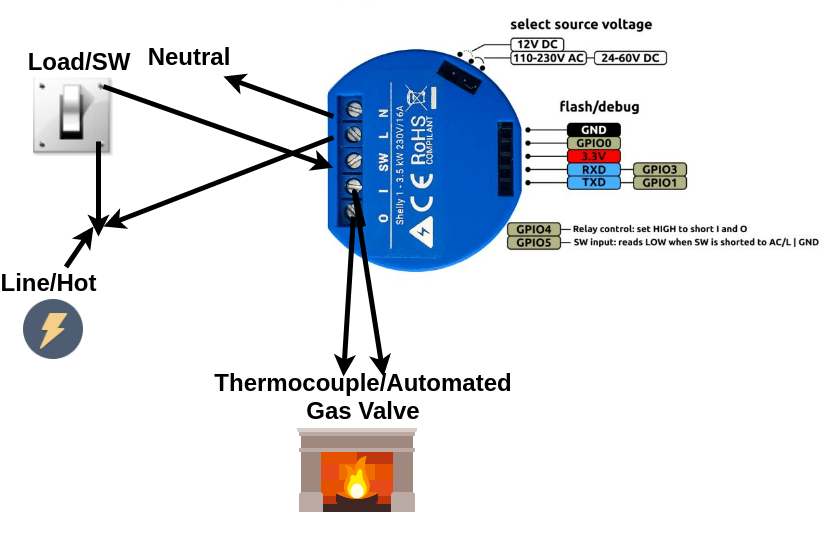
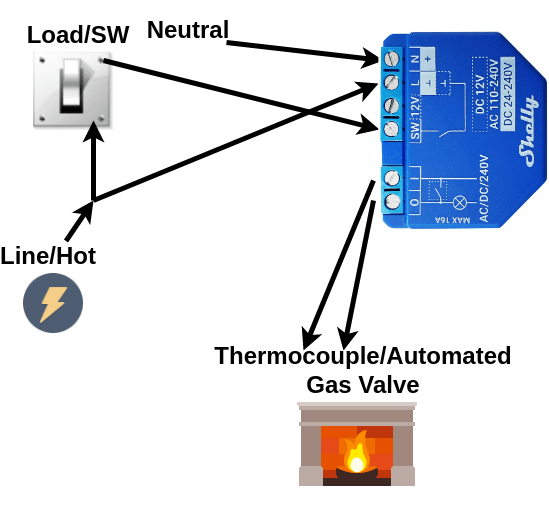
If you have enough room and an outlet underneath your fireplace, I recommend you make your fireplace smart by wiring in the Shelly with a DC adapter. Instead of connecting the Shelly up to mains power behind the switch in the wall, you would power the Shelly using a DC adapter and connect it to your thermocouple and light switch underneath your fireplace. I think this way of wiring is safer and probably not as frowned upon by inspectors. The wiring diagram would look like this:
Final thoughts about Shelly Plus 1
Well, there you have it. This article should show you the way to transition the wiring I used for my previous Shelly projects to the new Shelly Plus 1. In my opinion, the new Shelly is easier to wire. It also has a lot of other improvements you should check out.
Are you using the new Shellys? Let me know what you are using them for in the comments or on Twitter.
Interested in supporting HomeTechHacker?
Have you found the content on this site useful? If so, are you interested in supporting me and this site? There’s no obligation of course, but I would really appreciate any support you can give. Below are a few ways you can show support:
- Share this site with your friends and on social media (use the sharing links at the end of this page for your convenience)
- Subscribe to this site
- Purchase one of my books, The Personal Cybersecurity Manual, The Home Network Manual or The Smart Home Manual, for yourself or as a gift
- Put a link to HomeTechHacker on a site you have access to. Be sure to let me know about it!
- Enroll in HomeTechHacker Academy for free and premium online home technology courses.
- Reach out to me via my contact page or Twitter and let me know something I should write about
- Shop at Amazon through my affiliate links and ads on these pages. See my disclosures for more details about affiliate links. You can also just shop from one of the links below:
- HomeTechHacker Shop: This is a listing of products that I use, have reviewed, and that I recommend
- HomeTechHacker Technology Advisor: This suite of tools will give you customized home technology product recommendations based on your needs
- My Amazon affiliate link: Just click on this link to go to Amazon and shop
Thank you! I really appreciate it!