Looking to add smarts to your lights, but don’t want to replace the lights or the light switch? Are you looking for an inexpensive solution? The Wifi connected Shelly 1 relay can turn any dumb light switch in your house into a smart light switch for less than $15.

Shelly 1 relay background
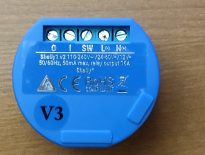
The Shelly 1 is a wifi-enabled smart relay that can control mains and low voltage items. It can be used to control garage doors, light switches, outlets, gas fireplaces, and more. It’s also small and inexpensive. I wrote about many of the potential uses for the Shelly in my review of the Shelly 1 if you are interested in more details.
Installing the Shelly 1 Relay
If you aren’t comfortable with these next steps, or something doesn’t seem right, call an electrician. No need to get hurt or cause a fire. That said most of these steps are pretty straight forward.
First, turn off the breaker for the circuit where you will install the relay. Use a line tester to make sure the power is off. Unscrew the light switch from the wall, but leave the wires intact.
Turn the breaker back on and determine which wire is live (hot). To do this, turn the light off and use a line tester to see which wire from the switch is still hot. This is your live connection from the switch, and whatever it is connected to from the wall is Line/Hot. Then go turn the breaker back off.
The Shelly requires quite a few connections. You need to wire in 5 inputs according to the following diagram.
Editor’s Note: Here are instructions for wiring the newer Shelly Plus 1 smart relay. And, you can also use the smaller Shelly Gen 3 relay.
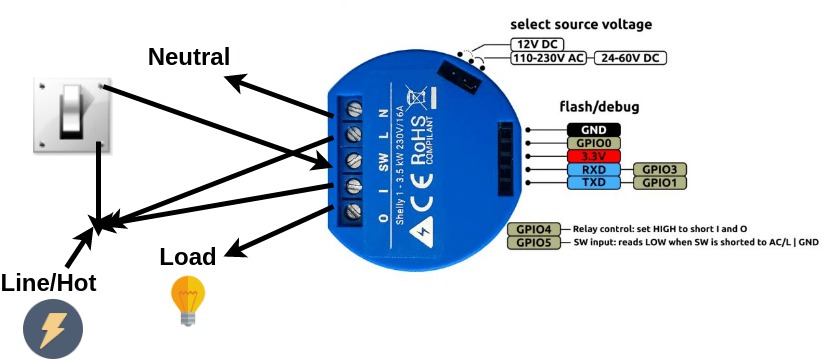
- N goes to Neutral (required)
- L and I and the Line/Live input on the light switch (which you determined above) connect to Line/Hot
- SW connects to the light switch input previously connected to load (light)
- O connects to the non-hot (load) wire previously connected to the light switch
You’ll have a gang of wires connected similar to below after you finish wiring everything. It may be a little hard to connect all of the line wires together. Be sure to twist them together well and to use a properly sized wire nut.

After you’re done with all this carefully shove the wires back in and flip the breaker on.
Configuring the Shelly 1
After the restoring power, the Shelly will boot up and broadcast a wifi network (e.g. shelly1-35FA58) that you should connect with a tablet, phone or laptop. After connecting, go to the IP address 192.168.33.1. This is the default address for the web interface.
If you connect using a device with a cellular connection you may have problems connecting to the Shelly IP address depending on your settings. You should be able to get around this by temporarily disabling your mobile network.
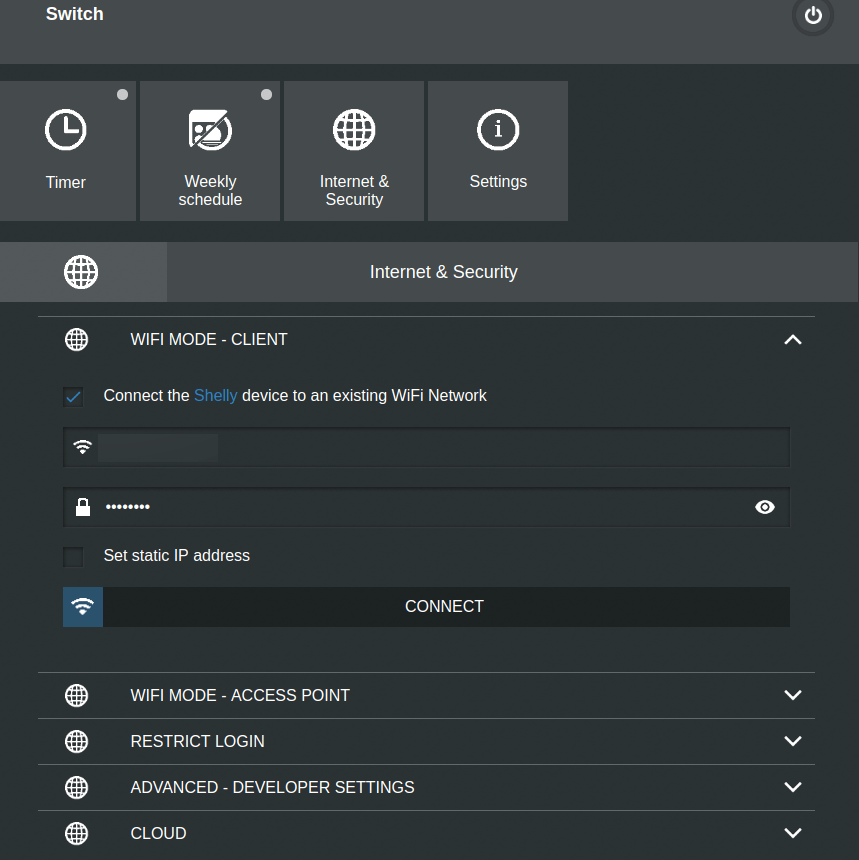
The first thing you’ll want to do is connect your Shelly to your Wifi network. Go to Internet & Security->WIFI MODE – CLIENT and fill in your Wifi credentials. Double check they are correct and press save.
I recommend you set up a static IP address here or set up a static DHCP lease using your router.
Connect to the IP address from of the Shelly (that you set as static in the web interface or that your router assigned) from a computer on your LAN. Go ahead and check for a firmware upgrade and apply if it’s available (Settings->Firmware Update).
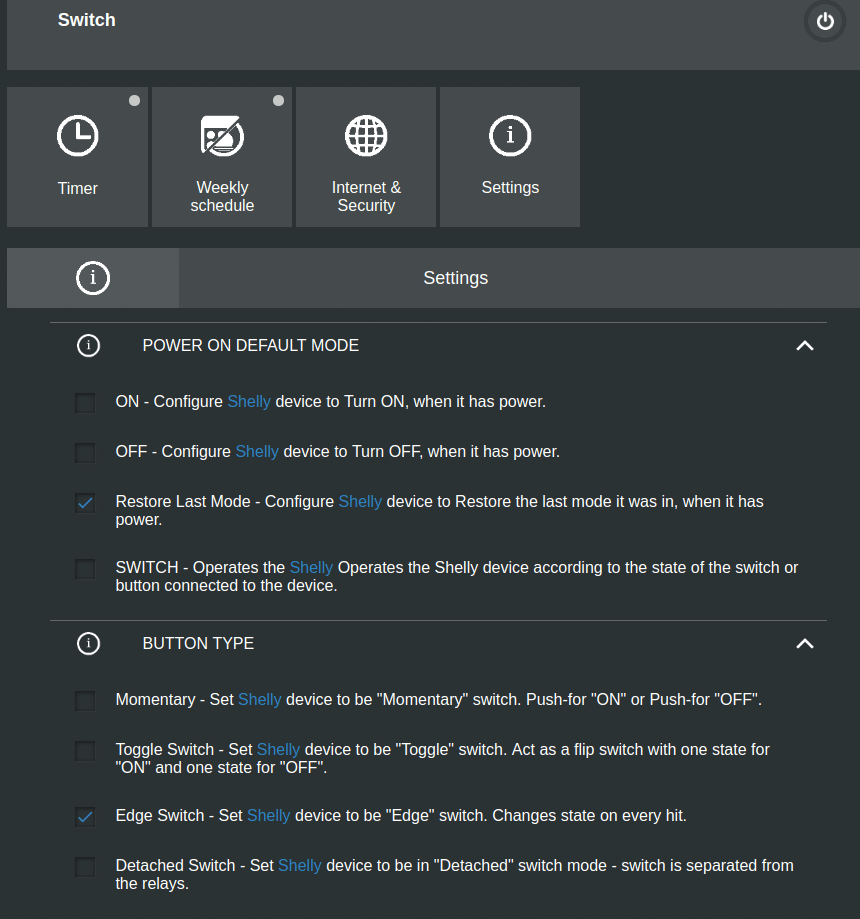
After your Shelly has rebooted, you’ll probably want to set the power on default mode to “Restore Last Mode.” This way the light will remember whether it was on or off after a power failure.
Additionally, change the button type to “Edge Mode” if you want the light switch to turn the light on/off with every toggle. Otherwise, if you turn the light off with the Shelly while the light switch is in the on position, you will have to turn the light switch off and then on again to turn the light on with the switch. I prefer to use the light switch as a toggle as it would behave in a 3-way configuration.
Using the Shelly 1 Relay Light Switch
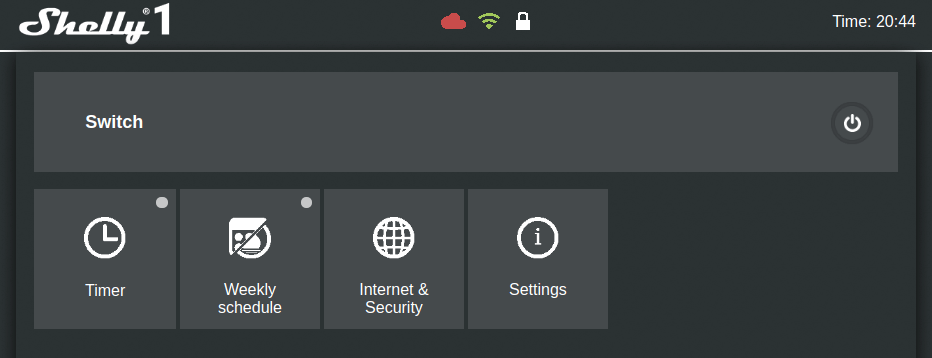
At this point, you can use the web interface to turn the light on and off. Just press the power button at the top right of the web interface.
If you want to access the light switch from the cloud using an app, you have to enable cloud access in the web interface. Then download the Shelly Cloud app and follow the instructions to set up an account and access.
Editor’s Note: Be sure to check out our article about many other useful DIY projects you can do with a Shelly relay.
Advanced: Integration with Home Assistant via MQTT
Home Assistant, my favorite automation controller, can integrate with the Shelly powered light switch via MQTT. First, you need to set up an MQTT broker and integrate it with Home Assistant. I’ve explained what MQTT is, how it works, and how to set it up in Home Assistant so I won’t repeat it here.
Setup MQTT on the Shelly 1 Relay
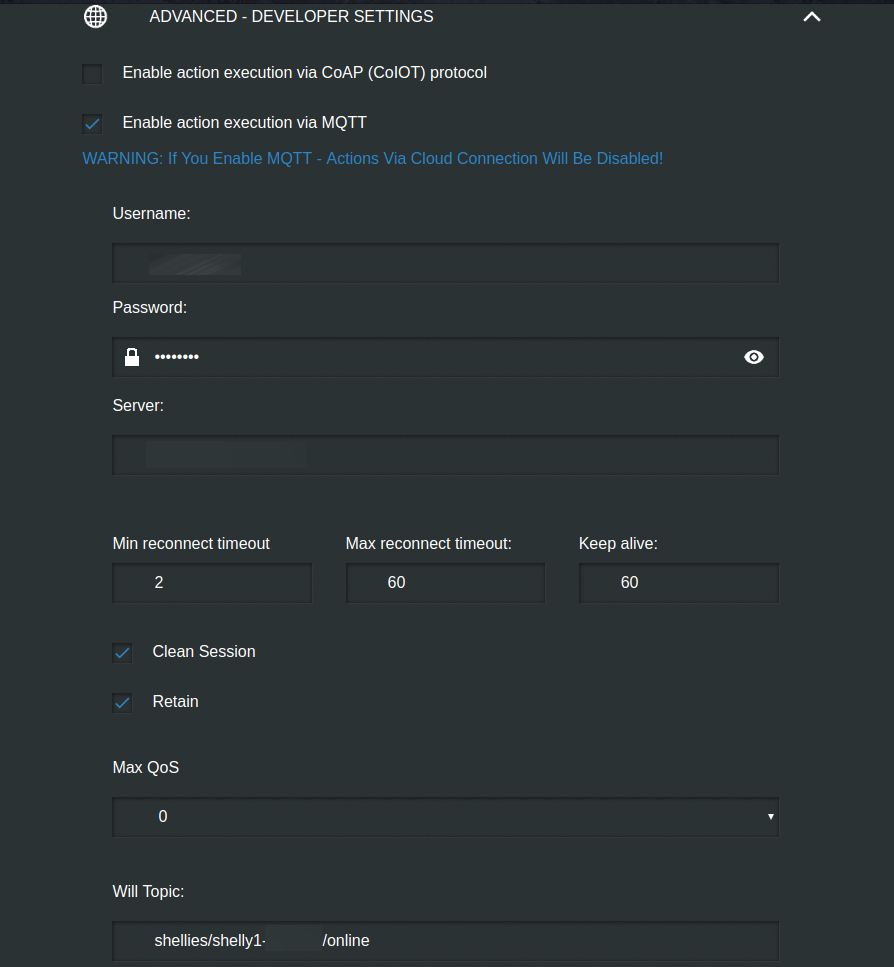
After setting up the broker you need to configure MQTT on the Shelly 1 relay. Go to the “Internet & Security->Advanced – Developer Settings” and:
- Click the check mark to “Enable action execution via MQTT” (note this will disable cloud access. It’s one or the other)
- If you secured your MQTT broker enter its username and password
- Under “Server:” enter the IP address of your MQTT broker along with its port (usually 1883). Separate the IP address and port with a colon.
- Save these settings
Take note of the “Will Topic.” This is the MQTT topic that communicates whether or not the Shelly is up and running. Note the 6 character string following “shelly-” in the will topic. You’ll need this to create the Home Assistant config.
Configure the MQTT light in Home Assistant
Now you just need to add a little YAML to your configuration.yaml file in your light section:
- platform: mqtt
  name: "Your Light"
  state_topic: "shellies/shelly1-xxxxxx/relay/0"
  command_topic: "shellies/shelly1-xxxxxx/relay/0/command"
  availability_topic: "shellies/shelly1-xxxxxx/online"
  payload_on: "on"
  payload_off: "off"
  payload_available: "true"
  payload_not_available: "false"
Replace the xxxxxx in the topics with the ID of the Shelly you noted in the web interface will topic. The entity id of your light will be what you put in the name field (spaces replaced by underscores). This code tells Home Assistant how to control and react to the Shelly 1 relay.
Sending “on” and “off” payloads to the command_topic will turn the light on and off, respectively. The state_topic tells Home Assistant whether the light is on or off (and is updated by the Shelly). The availability_topic tells Home Assistant whether or not the Shelly is online, and is also updated by the Shelly.
After you reboot Home Assistant your light will be up and running… Or maybe it won’t for a bit. Sometimes when I restart Home Assistant it takes a bit for the Shelly to become available because it doesn’t seem to retain the value of the will topic. You can fix this by removing the availability_topic, making the Shelly light appear as always available. Or you can add the following automation:
- id: mqtt_shelly_announce
  alias: Shelly Sync at HA Start
  trigger:
  - platform: homeassistant
    event: start
  action:
  - delay: 00:00:20
  - service: mqtt.publish
    data:
      topic: shellies/command
      payload: announce
Sending “announce” to the shellies/command topic tells all Shelly relays on your network to send an updated message to the Will Topic, allowing Home Assistant to see that they are available. With this automation, your Shelly relays should always appear as available 20 seconds after Home Assistant restarts.

Final thoughts
I’ve found the Shelly 1 to be versatile and easy to turn existing light switches smart. I’ve got it installed this way in a few light switches in my house and they work great and are more consistently quick responding than my Z-wave light switches. I hope this information has helped you.
If you were looking for a smart bulb with some style, instead of a smart switch, check out the Shelly Vintage smart bulbs. If you are looking for a dimmer, you should read my review and how-to for the Shelly Dimmer 2.
What do you think of Shelly 1? What are you using it for? Let me know on Twitter or in the comments.
Products used in this project:
Interested in supporting HomeTechHacker?
Have you found the content on this site useful? If so, are you interested in supporting me and this site? There’s no obligation of course, but I would really appreciate any support you can give. Below are a few ways you can show support:
- Share this site with your friends and on social media (use the sharing links at the end of this page for your convenience)
- Subscribe to this site
- Purchase one of my books, The Personal Cybersecurity Manual, The Home Network Manual or The Smart Home Manual, for yourself or as a gift
- Put a link to HomeTechHacker on a site you have access to. Be sure to let me know about it!
- Enroll in HomeTechHacker Academy for free and premium online home technology courses.
- Reach out to me via my contact page or Twitter and let me know something I should write about
- Shop at Amazon through my affiliate links and ads on these pages. See my disclosures for more details about affiliate links. You can also just shop from one of the links below:
- HomeTechHacker Shop: This is a listing of products that I use, have reviewed, and that I recommend
- HomeTechHacker Technology Advisor: This suite of tools will give you customized home technology product recommendations based on your needs
- My Amazon affiliate link: Just click on this link to go to Amazon and shop
Thank you! I really appreciate it!
This page contains affiliate links. If you purchase an item using an affiliate link I will receive a small commission at no cost to you. Affiliates do not influence my recommendations. Read my disclosures for more information.