Not too long ago I wrote about the current state of my smarthome, including my home lab. In short, my infrastructure was old, mangled together, and in need of consolidation and modernization. I spent a couple of weeks upgrading and updating my home lab while having as little downtime for the services my family relies on (often without even knowing it) as possible. Read on to learn what I did.
I should note, this article is more about explaining what I did than documentation or a how-to for all the things I did. This is not a step-by-step tutorial, but I will include the reasoning and results behind what I did.
This page contains affiliate links. If you purchase an item using an affiliate link I will receive a small commission at no cost to you. Affiliates do not influence my recommendations. Read my disclosures for more information.
Table of Contents
My home lab before updates and upgrades
My home lab infrastructure was old and kludged. It basically consisted of two computers:
- Firestorm (I name most of my computers and virtual machines (VMs) after DC comic book characters) – This is a 10-year-old Sandy Bridge Core i7 computer that I built to be my primary desktop. It has served as my primary file server. It also ran my pfSense router VM and my Home Assistant VM using VirtualBox. The primary problem with this computer is that VirtualBox is a relatively inefficient type 2 hypervisor, and the host OS was Ubuntu 14.04 – a 7 year old out of support desktop OS.
- Superman – This is a more modern 2.5-year-old machine that I bought from System76 (here’s my review of the machine) and customized over the last couple of years. This machine is the day-to-day desktop that I work on. It runs a more modern but still older Ubuntu 18.04 OS. The primary problem with this machine is that it also runs VirtualBox VMs I rely on (my Docker VM, and my VM that runs my reverse proxy and video surveillance system, Zoneminder). It also hosts my backups. It’s not so great to have your primary desktop also hosting server services because it needs to be running all the time.
My home lab upgrade goals
I had many cost-related, functionality, and simplification reasons and goals for rebuilding my home lab:
- Stop relying on a 7-year-old (Ubuntu 14.04) desktop OS to host my router VM, my Home Assistant VM, and serve as my primary file server. (If you are interested, here is a list of good Home Assistant hardware choices)
- Learn and start using Proxmox as my primary Hypervisor.
- Stop relying on my primary desktop for my Docker (which includes things like my MQTT broker, Graylog, Emby, and Plex), my ZoneMinder, and reverse proxy VMs.
- Improve the speed of my ZoneMinder VM. It is pretty slow running in Virtualbox, even with a fair amount of resources.
- Upgrade all of my VM base OSs from Ubuntu 18.04 to Ubuntu 20.04 (server).
- Improve my Internet speeds. Virtualizing my router was initially intended to be a stopgap when my router hardware died a couple of years ago. It has been rock solid, but the network interface cards (NICs) and virtualization don’t seem to be able to keep up with my Centurylink gigabit Internet.
- Have minimal downtime as I update and migrate VMs.
- Not spend more than $400 on hardware.
My hardware choices
Here are the specs for the hardware I started with:
| Superman (built 2018) | Firestorm (built 2011) |
|---|---|
| Purpose: Primary desktop, VM host, file backup server | Purpose: Primary file server, VM Host, router |
| Core i7-8700 (8th Gen) 32GB RAM 8TB Storage (spread across 3 drives) 5 NIC Ports No drives | Core i7-2600 (2nd Gen) 32GB RAM 11TB Storage (spread across 3 drives) 4 NIC Ports BluRay Drive |
While “Firestorm” is an aging computer, it has been rock solid, so I decided I would keep the hardware and simply repurpose the machine. It’s uptime before I repurposed it was actually 450 days!
Superman is fairly modern and makes a great desktop machine, so I decided to kept that machine the same.
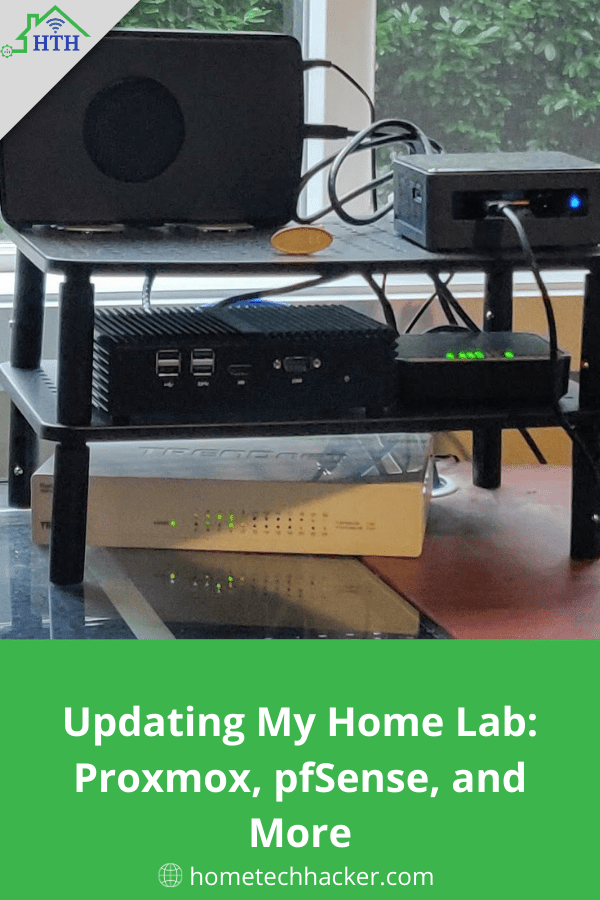
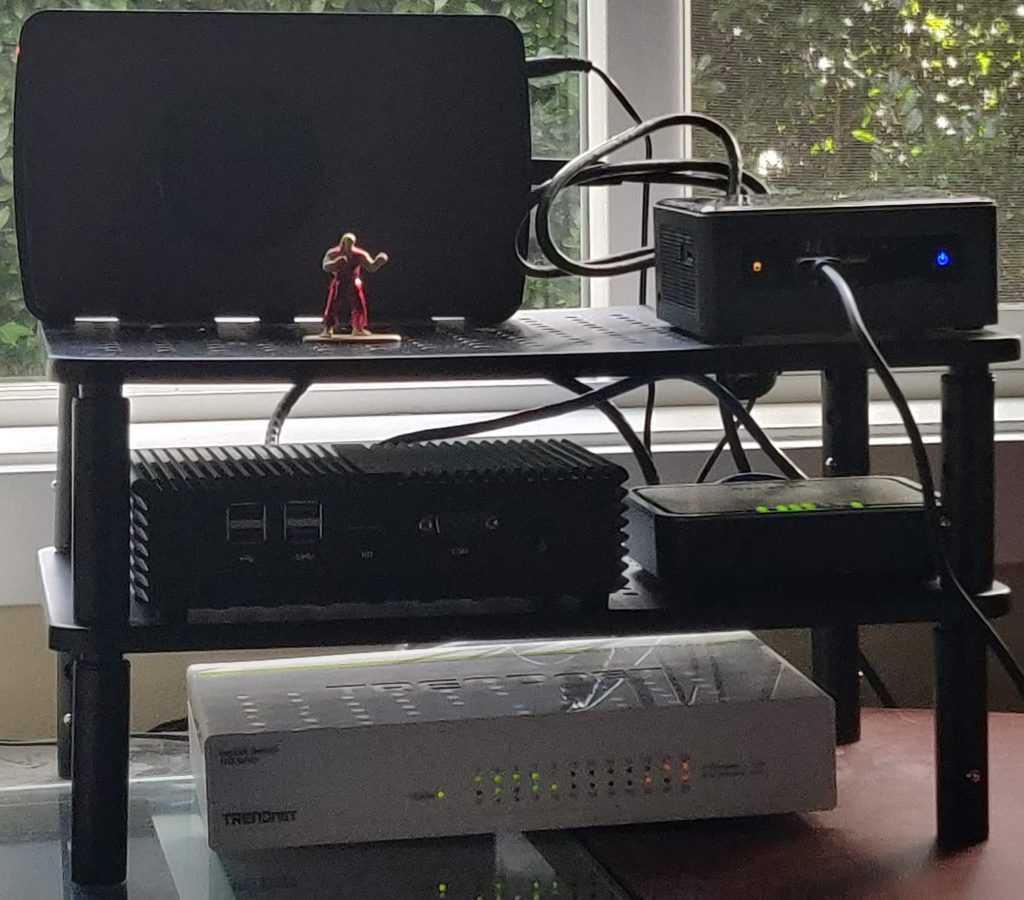
In order to accomplish my goal of minimal downtime and, learning Proxmox I decided to buy a new machine to serve as my primary VM Host. I ended up going with a NUC with the following specs:
- I purchased a NUC 8 Mainstream kit (NUC8i5BEH) Tall without a hard drive or RAM. It comes with an 8th Gen Intel Core i5-8259U processor. Here are other good options for small form factor Proxmox hardware.
- 2022 UPDATE: I purchased an ASUS PN63-S1 to run as a backup Proxmox host.
- I bought 3 hard drives: A Western Digital Blue 500GB NVME SSD (Proxmox OS Drive plus images), a Samsung 860 Evo 500GB SSD (for VMs), and a 2TB Western Digital Purple Surveillance hard drive for my ZoneMinder network video recorder, which I put in this Fideco external hard drive enclosure because it obviously doesn’t fit in the NUC.
- 32GB of Crucial RAM (2x16GB sticks)
I waited for sales and price drops and was able to keep this all to a little over $400. However, I also wanted to go from a software to a hardware router again. This is a purchase I had been putting off.
I wrote a popular article about choosing pfSense hardware, and I just decided to take my own advice and bought one of the machines I recommend: the Qotom Mini ITX Q330G4.
That’s all the hardware I bought (for now :)).
What I did and why
My primary step by step plan was to do the following:
- Install Proxmox on the new NUC (which I named Deathstroke).
- Create a base Ubuntu Server 20.04 template image for my new VMs.
- Recreate all existing VMs (with some consolidation) from Superman and Firestorm on Deathstroke, except for my pfSense router VM. Create them using the template I created in step 2. As they are recreated, backup and shut down the original VirtualBox VMs.
- Install pfSense on the new router hardware and restore my config to it after shutting down the router VM.
- Install Proxmox on what was Firestorm, turning it into Amazo, and then create a virtual Ubuntu 20.04 based fileserver (Samba, NFS).
- Have a drink!
How it turned out
Overall, it took me about two weeks in my spare time to do all of this. While I recreated my services in the new VM, I spent a good amount of time documenting the steps so I could recreate them at any time. Starting from a Proxmox template saved a lot of time too. As I replaced each VM, 1 by 1 I shut down and archived the old VM and brought up the new one. The only one I had any troubles with was my Home Assistant VM, and that’s because I neglected to copy over all of my configuration files. Otherwise, swapping VMs never resulted in more than 5 minutes of downtime.
The router swap took a little more time because of a misconfiguration of interfaces. All in all, my family did not experience any frustration from the changes. Just a little time with no Internet access and a little time with the fileserver being down.
A few things stood out about my experience:
- Learning Proxmox took some time. I spent a lot of time learning about how storage works with Proxmox and what configuration would best serve my needs before I started. I got to play a lot before moving my VMs over. It was great to have a machine the rest of my family wasn’t dependent on to help with my learning.
- My Internet speeds are now WAY faster with the hardware router. I was topping out at about 400 Mbps up and down with the virtual router, but I approach Gigabit both ways with the hardware router. My guess is some slowdowns with the virtualizations along with older Realtek NICs on my VM were to blame for the slowness. I’m giddy about the improved speeds!
- I now have a backup Hypervisor. This means I can pretty easily migrate my VMs from one Proxmox host to another (they have shared storage). If I need to take one down for a bit, I can (except for the file server, which would be a bit more complicated).
- I enhanced my file server with WebDAV and FileStash running in Docker. This makes it even easier to access files from any computer on the network, regardless of OS.
What’s left to do
There is always more to do. In the short-term I plan to investigate using a Proxmox cluster as right now my two Proxmox hosts are independent. I also plan to investigate setting up a docker swarm or Kubernetes to have high availability and failover with my Docker containers, which I have more and more of every day.
Unfortunately, my primary desktop is still my backup file server (on-premise, I also back up my files offsite, as I detailed here). I plan to virtualize my backup server in the near future, but I want to buy more storage first. Just waiting for the right sale. I also need to upgrade my primary desktop to Ubuntu 20.04 (Edit: Done!). This won’t be a problem now that I don’t rely on it as a VM Host. I also plan to move my file storage to a NAS (Edit: Done! Here’s the NAS I chose).
I still use my Blu-Ray drive occasionally, but I can’t easily now because it is in a Proxmox host. I’ll need to either move it over to my primary desktop, or spin up a desktop VM and see if I can pass it through.
I also need a good UPS solution for my backbone network switch. I have had a few solutions that didn’t work so well, so I’d like to find a better one (Edit, I found a solution. Here’s the UPS I use now).
I’m also going to improve my server and network documentation. It’s not bad, it just needs some more organization. I’m going to give DokuWiki a try. If that doesn’t fit my needs, I’ll probably go with a WordPress site.
Most of all, I need to keep learning. There’s so much more I can do with Proxmox and Docker. I always want to be ready for the next thing!
Final thoughts
Updating my home lab took a lot of effort and planning, but it was all worth it. I’ve improved all of my services. At the same time, I’ve made it easier to add more features and keep the current ones updated. I’ve reduced my energy usage, improved my Internet speeds, and created redundancies for all of my critical services. I am glad I won’t have to do this level of effort for years to come. When I do, it will hopefully be even easier with this technology stack.
What do you use as your home technology stack for your home lab? How do you handle large updates, upgrades, and migrations? Let me know on Twitter or in the comments!