
Do you worry about flooding in your house? Would you like to be notified when a leak or flood occurs? I recently set up and tested the Meross MS400 smart leak sensor. Is this leak sensor any good? How hard is it to set up? Read this quick review to find the answers to these questions.
Editor’s note: I received the Meross MS400 leak sensor free of charge in exchange for a review. This in no way affects my review. My opinion is always an honest one.
This page contains affiliate links. If you purchase an item using an affiliate link I will receive a small commission at no cost to you. Affiliates do not influence my recommendations. Read my disclosures for more information.
Table of Contents
Meross MS400 Specs


You can get the sensor by itself (MS400) or the MS400HHK kit, which includes the Meross Wi-Fi hub (the MSH300HK). You need to have this Wi-Fi hub to use this sensor and some other devices. The hub makes these devices available via the cloud and adds integration with other ecosystems like Alexa, Google Assistant, and HomeKit. If you already have one of those, you don’t need the kit, just the sensor.
I already have the Meross MS100FHHK kit (temperature and humidity kit) which includes the Wi-Fi hub, so I don’t need the Wi-Fi hub that came with this kit. If you want to learn more about the hub, be sure to read that review article.
Editor’s Note: You can buy the MS400HHK and other Meross devices directly from Meross. Use the code HTH15 for 15% off.
Below are the specs for the MS400:
| Dimensions | 2.3 × 1.6 × 0.8 inches |
| Battery | CR123A Battery, replaceable |
| Alarm volume | About 60 dB (A) at 1m (3ft) |
| Wireless standards | 433MHz (between smart hub and sensor), 802.11 b/g/n, 2.4GHz (smart hub) |
| System requirements | iOS 13 or later, Android 6.0 or later |
| Operating temperature | 0°C~40°C (32°F~104°F) |
| Smart home compatibility | Google Assistant, Amazon Alexa, Apple HomeKit, Home Assistant |
What’s in the box?
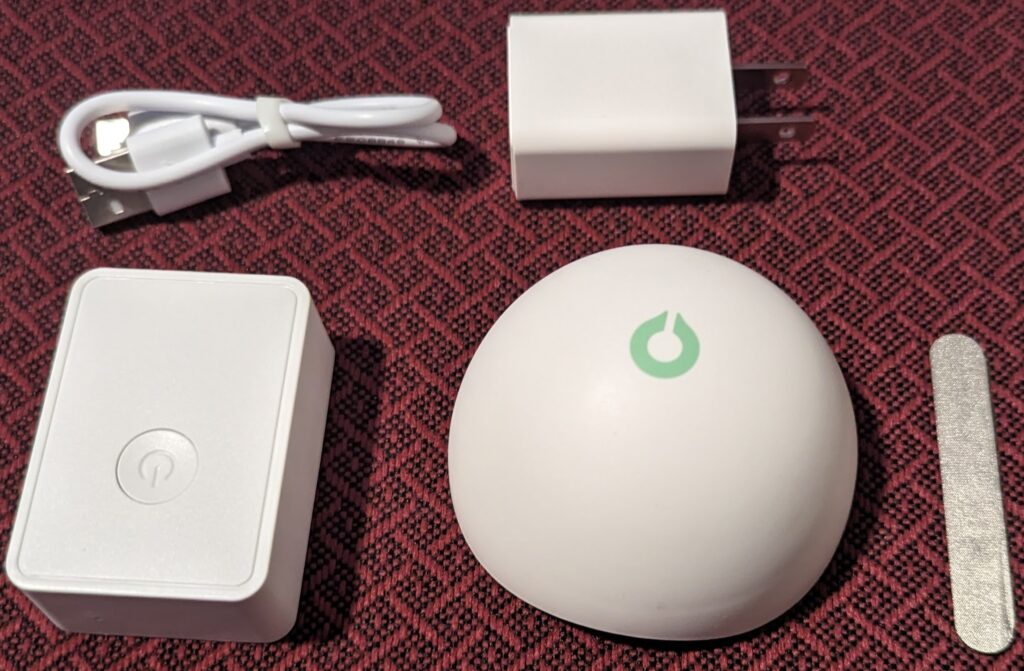
- MS400 Smart Water Leak Sensor
- MSH300HK Smart Wi-Fi Hub
- USB-A to micro USB cable
- Power brick
- Conductive fabric
Meross MS400 setup
Setting up the device is straightforward. You first must download the app and create an account if you haven’t already. You’ll also need to provision the Wi-Fi hub. Again, how to do this is detailed in my previous Meross device review.
- Click the + button at the top of the app to add the MS400 sensor. You’ll have a list of device categories to choose from and you’ll want to choose from the sensors, and then select the MS400.
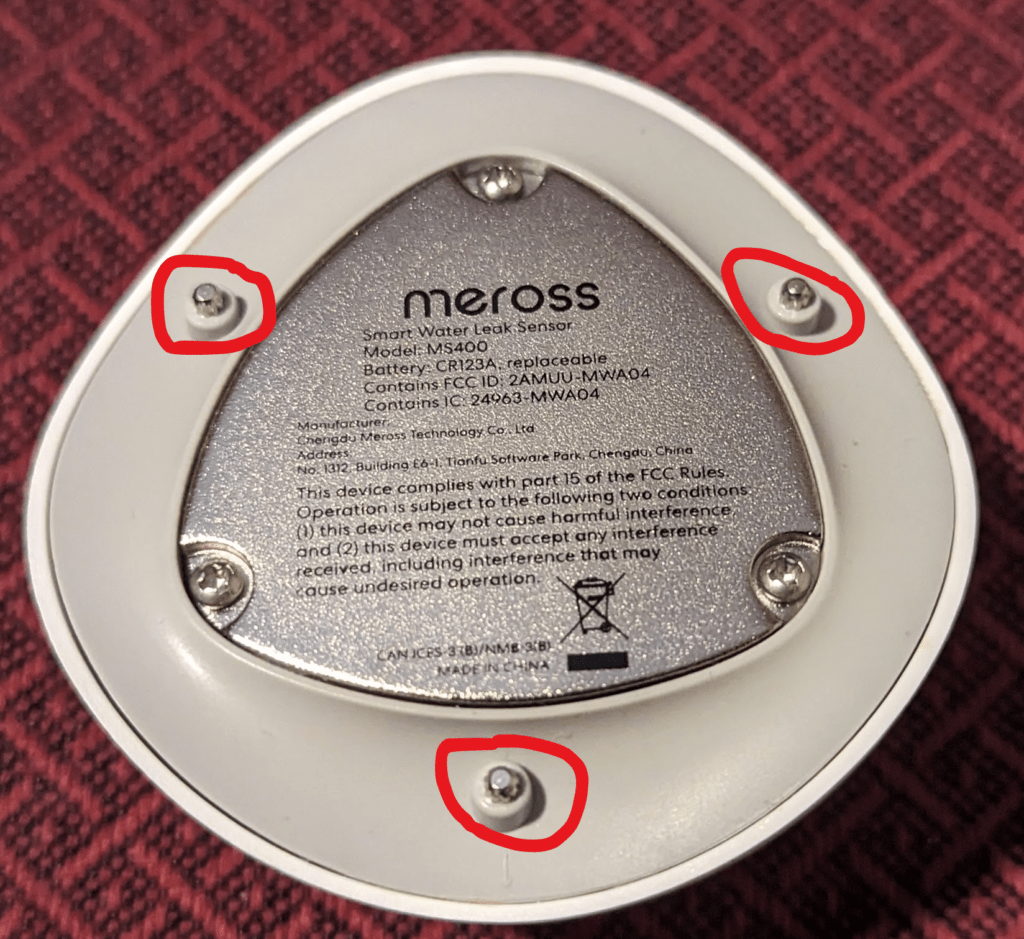
- Then you just follow the steps in the app. You’ll need the provided conductive fabric to put the MS400 into pairing mode. The sensor has three conductive sensors on the bottom. You need to touch the conductive fabric to the sensor on the bottom and one of the other two sensors (circled below) three times within 5 seconds to enter pairing mode.
When it is done pairing, you’ll see the device available in the Meross app.
Adding the leak sensor to Home Assistant
As regular readers know, I am a big Home Assistant fan. It is the perfect smart home hub for me. My smart home devices need to be able to integrate with Home Assistant so I can maximize the “smarts” in my smart home.
Integrating any device connected to the Meross Wi-Fi hub is straightforward. You can use Home Assistant’s HomeKit Controller integration. Chances are, the Meross hub was already detected by Home Assistant and is waiting to be set up. If it hasn’t you can simply add the integration.
Either way, you’ll be asked for a pairing code. This can be found on the side of the Meross Wi-Fi hub. After entering it, Home Assistant will automatically create a binary sensor for the MS400 leak detector. That’s all it takes.
Using the Meross Water Leak sensor
There is not much to “use” with a water leak sensor. I put it in a little bit of water and immediately got a sound warning and an alert in my app (and in Home Assistant). That’s what you want from a leak detector!
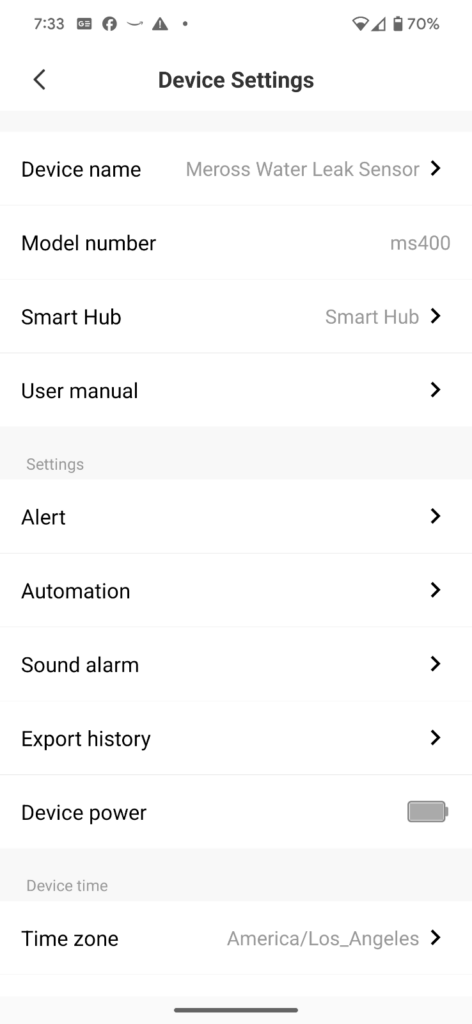
That said, you can configure a few settings via the app:
- You can set it to alert when a water leak is detected, no longer detected, or when the battery is low (Alert). You can also decide whether you want an audible alarm or not (Sound alarm)
- You can have this device trigger an action by another Meross device (Automation)
The only thing I have to decide is whether to put this in my laundry room or replace one of my basement leak sensors, which leads me to…
MS400 alternatives
There are lots of leak sensors out there on the market. I have two others:
What sets the Meross leak sensor apart from these sensors is integration with the Meross ecosystem and compatibility with HomeKit. Plus, it just seems more solidly built and constructed.
My FortrezZ is long in the tooth and keeps reporting 0% battery, so I think I’ll replace that sensor with this one.
Also, here are some alternative popular leak sensors on Amazon:


Final thoughts
The Meross MS400 smart leak sensor is another solid Meross product. I’ve reviewed a few Meross products over the last few months:
- Meross MS200 Smart Door and Window Sensor
- Meross MS100F Smart Temperature and Humidity Sensor
- Meross MSL430 Wi-Fi Ambient Light
And all have been solid and reliable.
A reader sent me a comment noting that Meross support is non-existent. I haven’t had any problems with Meross support, personally. I have only used them to get information about a product. I reached out to Meross directly and here was their response:
If purchased product is found to be defective and is still covered under this warranty policy, customer may have a replacement processed by steps listed below:
· Send e-mails to [email protected] to claim a problem found and offer device details including purchase date proof;
· Wait for the customer service to reply;
· Follow steps provided by the customer service
Meross support
If you are looking for a leak sensor, I recommend this one.


Have you compared its performance to the Aqara Leak detector? I hear lots of good things about it as well.
No I haven’t. Maybe I’ll check that one out too.