Smarthomes are fun, but they can be expensive. As I researched smarthome devices I noticed there are lots of 433Mhz RF sensors and devices that are available for much less than Z-Wave, Zigbee and Wifi sensors. But how do I get them to play nicely with the rest of my Smarthome? Home Assistant, MQTT, Tasmota, and the Sonoff RF Bridge to the rescue! Here’s how to use a Sonoff RF Bridge to inexpensively expand your smarthome capabilities.
Table of Contents
What we need for this project
There are a few tools you are going to need for this project (no solder required!):
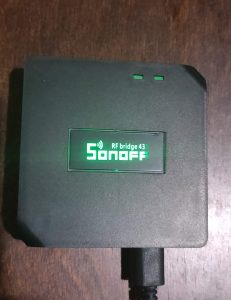
- Sonoff RF Bridge
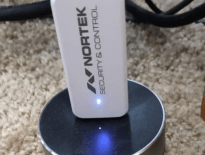
- USB to TTL adapter
- Pin headers
- Jumper wires
- 433Mhz RF devices like door sensors, buttons, and remotes.
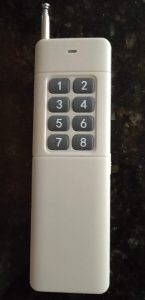
You can get all of these from places like AliExpress on the cheap if you are willing to wait a few weeks for delivery. I bought all of my equipment from AliExpress, including buttons like this, this, and this and this RF remote. Just make sure you are getting 433Mhz devices, not 315Mhz.
Step 1: Flash the Sonoff RF Bridge with Tasmota
There are many tutorials and videos for how to do this so I’m not going to get into this in great detail. In general, the steps are:
- Download the Tasmota software
- Take apart the Sonoff RF Bridge and expose the headers
- Connect the headers to your USB to TTL device
- Flash the device using something like the Arduino IDE (customize the code to connect to your Wifi network and MQTT Broker)
The video below walks through this step by step:
Step 2: Capture RF signals using Sonoff RF Bridge
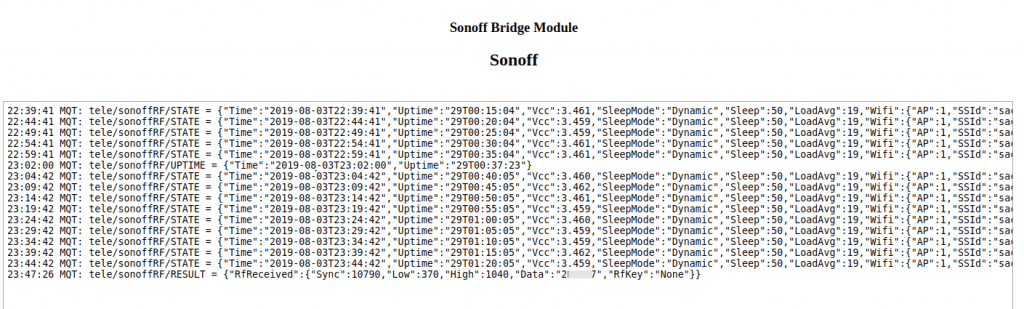
Now that you’ve got the bridge flashed with Tasmota, go to the IP address of the bridge. Next, you’ll want to go to the Console page. Press a button or activate one of your RF devices. The console should quickly show a line similar to:
23:47:26 MQT: tele/sonoffRF/RESULT = {"RfReceived":{"Sync":10790,"Low":370,"High":1040,"Data":"123456","RfKey":"None"}}This tells you the topic for the Sonoff (in my case tele/sonoffRF/Result). It also tells you the key identifier for the device you pressed or activated in the field right after “Data.” I’ve modified it to be 123456 in this case, but it will be something different for you. You will need to write down this identifier for use in Home Assistant to identify and process the MQTT payload the bridge sends when it receives an RF signal.
Step 3: Integrate into Home Assistant using MQTT
Assuming you’ve already set up your MQTT Broker it is now time to configure the Home Assistant binary sensors and MQTT payload processing.
Sonoff RF Bridge payload processing options
There are a couple of different ways you can configure Home Assistant to process the MQTT signals the Sonoff RF bridge sends when it receives an RF signal:
- Use value_templates – In this strategy, all binary sensors subscribe to the same topic published by the RF bridge (in my case, this is tele/sonoffRF/Result, but you can configure this in the Tasmota UI). All sensors will receive every payload and will need to use a value_template to process payloads specific to them and produce a valid state.
- Use a demultiplexer – This strategy uses automation to separate the RF Bridge’s single topic into multiple MQTT topics. This way, each sensor only subscribes to its intended payload. This takes a bit more setup work than using the value templates, but as you add more sensors this becomes more efficient and easier to configure.
These options are explained in more detail in this Home Assistant forum post, which is the source of most of this information. I decided to go with the demultiplexer script because it reduces some of overhead of all sensors subscribing to the same topic.
Setup demultiplexer python script
The first thing you need to do is set up Home Assistant to use a python script. This python script will contain the code to separate the RF bridge topic into individual topics for each sensor. Add
python_script:
to your configuration.yaml file. This will allow you to call a python script from within Home Assistant. Next, create a python_scripts subdirectory in the same directory as your configuration.yaml file. Restart Home Assistant to be able to use python scripts.
Create a new file in the python_scripts called rfbridge_demux.py with the following code:
d = { '2C8D0A':['sensor1','ON','true'],
      '2C8D0E':['sensor1','OFF','true'],
      'E5D30E':['sensor2','ON','false'],
      '30D8A0':['sensor3','ON','false']
    }

p = data.get('payload')

if p is not None:
  if p in d.keys():
    service_data = {'topic':'home/{}'.format(d[p][0]), 'payload':'{}'.format(d[p][1]), 'qos':2, 'retain':'{}'.format(d[p][2])}
  else:
    service_data = {'topic':'home/unknown', 'payload':'{}'.format(p), 'qos':0, 'retain':'false'}
    logger.warning('<rfbridge_demux> Received unknown RF command: {}'.format(p))
  hass.services.call('mqtt', 'publish', service_data, False)
This code parses the payloads sent by the RF Bridge and then publishes to the specific topic you specify. You will need to modify the code at the top of the file to match your sensor topics and the data the bridge publishes (the field right after “Data”: in the Tasmota console).
In the code above, when a button is pressed that sends the RF bridge the data 2C8D0A this code will send the payload ‘ON’ to the MQTT topic /home/sensor1 with retain status set to true. You can modify the topic, payload and retain status to suit your needs.
Create an automation to call demultiplexer
Unfortunately, this python code doesn’t call itself. You need to set up an automation that’s called when the Sonoff RF bridge publishes an MQTT payload:
- id: rfbridge_demultiplexer
  alias: 'rfbridge_demultiplexer'
  initial_state: 'true'
  trigger:
  - platform: mqtt
    topic: tele/sonoffRF/RESULT
  action:
  - service: python_script.rfbridge_demux
    data_template:
      payload: '{{trigger.payload_json.RfReceived.Data}}'
The key thing to note in this automation is the topic. Make sure it matches what your Sonoff RF bridge is configured to send.
Create MQTT binary sensors
You also need to create the binary sensors that you are associating with the RF signals. I’ll give two examples, also pulled from the Home Assistant forums:
 - platform: mqtt
    name: 'Bathroom Door'
    state_topic: 'home/sensor1'
    device_class: Door

  - platform: mqtt
    name: 'Button1'
    state_topic: 'home/sensor3'
    off_delay: 1
The first binary sensor (Bathroom Door) is for a door sensor that reports both an open and closed state (On/Off). In the python code earlier in this article you can see that two RF signals publish to the home/sensor1 topic. This represents the opening and closing of the door. Retain (in the python code) is set to true so that state can be known even when Home Assistant is restarted.
The second binary sensor is for a button. Most RF buttons only send a signal when they are pressed. This means retain should be set to false as this button is always off except right when it is pushed. Since the button itself doesn’t publish an off state, you can have the binary sensor automatically switch to off after a delay (in this case, a delay of 1 second).
What I’m using the Sonoff RF Bridge for
You can set up automations to trigger based on these binary sensor state changes to make pressing the buttons they represent actually do something. I use RF buttons in various ways around the house to do the following:
- Turn on my irrigation system zones – I have an Etherrain smart irrigation controller that doesn’t have any physical buttons. It can only be controlled via an app or APIs. Using the APIs, I wrote some simple code to turn on each zone individually that I can call from Home Assistant. Here’s how I fully automated my irrigation controller via Home Assistant. Using the techniques above I tied pressing various RF buttons to turning on each zone on the remote below:
- Panic buttons – I installed small RF panic buttons around the house that trigger an automation that turns on a panic light visible from the street as well and sends texts to key people. I have an alarm system, but this is just extra insurance.
- Buttons to trigger various automations – I have a button that triggers a goodnight automation that my wife uses. It turns off all the main floor lights, locks the doors, arms the alarm, and illuminates a path upstairs to the bedroom for 3 minutes.
Editor’s Note: You could also just use Shelly Wi-Fi buttons for an easier and more elegant solution.
Sending RF signals to devices
This article has focused on processing RF signals sent by devices in your home. Some devices can be controlled by RF signals as well. I go into more detail about how to use the Sonoff RF Bridge to send signals here.
What about Infrared (IR) signals?
Check out my review of the BroadLink RM4 Mini to learn how to send and receive IR signals using their app or Home Assistant.
Final Thoughts
I’m pretty happy with being able to use cheap RF devices with my home automation system. After going through these steps, setting up new RF devices is pretty easy. This saves me money, which I’m always happy with!
Interested in supporting HomeTechHacker?
Have you found the content on this site useful? If so, are you interested in supporting me and this site? There’s no obligation of course, but I would really appreciate any support you can give. Below are a few ways you can show support:
- Share this site with your friends and on social media (use the sharing links at the end of this page for your convenience)
- Subscribe to this site
- Purchase one of my books, The Personal Cybersecurity Manual, The Home Network Manual or The Smart Home Manual, for yourself or as a gift
- Put a link to HomeTechHacker on a site you have access to. Be sure to let me know about it!
- Enroll in HomeTechHacker Academy for free and premium online home technology courses.
- Reach out to me via my contact page or Twitter and let me know something I should write about
- Shop at Amazon through my affiliate links and ads on these pages. See my disclosures for more details about affiliate links. You can also just shop from one of the links below:
- HomeTechHacker Shop: This is a listing of products that I use, have reviewed, and that I recommend
- HomeTechHacker Technology Advisor: This suite of tools will give you customized home technology product recommendations based on your needs
- My Amazon affiliate link: Just click on this link to go to Amazon and shop
Thank you! I really appreciate it!
This page contains affiliate links. If you purchase an item using an affiliate link I will receive a small commission at no cost to you. Affiliates do not influence my recommendations. Read my disclosures for more information.